and the distribution of digital products.
Implement Free Trials in Your App With StoreKit 2: a Step-by-Step Guide
\ Offering a free trial is a great way to encourage users to try out the premium features of your app, increasing the chances of converting them into paying subscribers. With StoreKit 2, Apple has introduced enhanced tools to help you check a user's eligibility for introductory offers. In this article, we'll guide you through implementing free trials in your app, complete with code snippets to verify user eligibility. We'll also cover testing scenarios for both eligible and ineligible users. And be sure to keep an eye out for "Pro Tips" scattered throughout the article, where I share some personal insights from my experience!
\
How to Set Up Free Trials for Your App in App Store ConnectBefore you begin coding, make sure to configure your in-app purchase settings in App Store Connect:
- Log in to App Store Connect and go to the "My Apps" section.
- Select your app and navigate to the "Features" tab.
- Under "In-App Purchases," create a new Auto-Renewable Subscription product.
- Define your subscription details, including pricing and a free trial period (e.g., 7 days) by setting up an introductory offer.
- Save your changes.
I will make this simple by showing you the code snippet, for how you want to compute the trial eligibility for the user
Create a SwiftUI view to display the free trial offer and handle user interactions. I will be leaving alot of comments in the code snippet to walk you through.
\
import StoreKit2 // StoreManager is responsible to communicate with Storekit Framework provided by Apple for monetization class StoreManager: ObservableObject { @Published var message: String = "" // We will use this property to display the right message to the user @Published var products: [Product] = [] // This will be responsible to store the products fetched that we defined // in App Store Connect // Fetch products from the App Store func fetchProducts() { Task { do { // product_id is the id that you would have defined in App Store Connect. let storeProducts = try await Product.products(for: ["product_id"]) products = storeProducts } catch { message = "Failed to fetch products: \(error.localizedDescription)" } } } // Initiate purchase func purchase() { guard let product = products.first else { // There is a possibility of products not being fetched from App Store Connect. // Pro Tip: From experience, even though we defined the products on App Store Connect, it is possible // that the products are not found post attempting to fetch. So, it is important to handle this case. message = "No product available." return } Task { do { let result = try await product.purchase() switch result { case .success(let verification): switch verification { case .verified: message = "Purchase successful!" case .unverified: message = "Could not verify the purchase." } case .userCancelled: message = "Purchase cancelled." case .pending: message = "Purchase is pending." @unknown default: message = "Unknown result." } } catch { message = "Purchase failed: \(error.localizedDescription)" } } } // Check if the user is eligible for a free trial func checkTrialEligibility() async -> Bool { guard let product = products.first else { return false } do { // So when you define a auto renewable subscriptions, there are usually bond in a group. The group can again be // found in App Store Connect let eligibility = try await product.subscription?.isEligibleForIntroOffer(for groupID: 111111) return eligibility ?? false } catch { message = "Error checking trial eligibility: \(error.localizedDescription)" return false } } }\
import SwiftUI import StoreKit struct SubscriptionView: View { @StateObject private var storeManager = StoreManager() @State private var isEligibleForFreeTrial = false var body: some View { VStack { Text("Unlock Premium Features") .font(.title) .padding() Text("Get a 7-day free trial of our premium subscription.") .multilineTextAlignment(.center) .padding() Button(action: { storeManager.purchase() }) { // Based on user status, we can display the text Text(isEligibleForFreeTrial ? "Start Free Trial" : "Start Subscription") .bold() .frame(width: 200, height: 50) .background(Color.blue) .foregroundColor(.white) .cornerRadius(10) } Text(storeManager.message) .padding() } .onAppear { storeManager.fetchProducts() checkTrialEligibility() } } private func checkTrialEligibility() { Task { isEligibleForFreeTrial = await storeManager.checkTrialEligibility() } } } Test Free Trial Eligibility States in XcodeApple provides robust tools for testing different user states (e.g., eligible or ineligible for a free trial) using StoreKit Testing in Xcode:
Create a StoreKit Configuration File:
Go to File > New > File… > StoreKit Configuration File in Xcode.
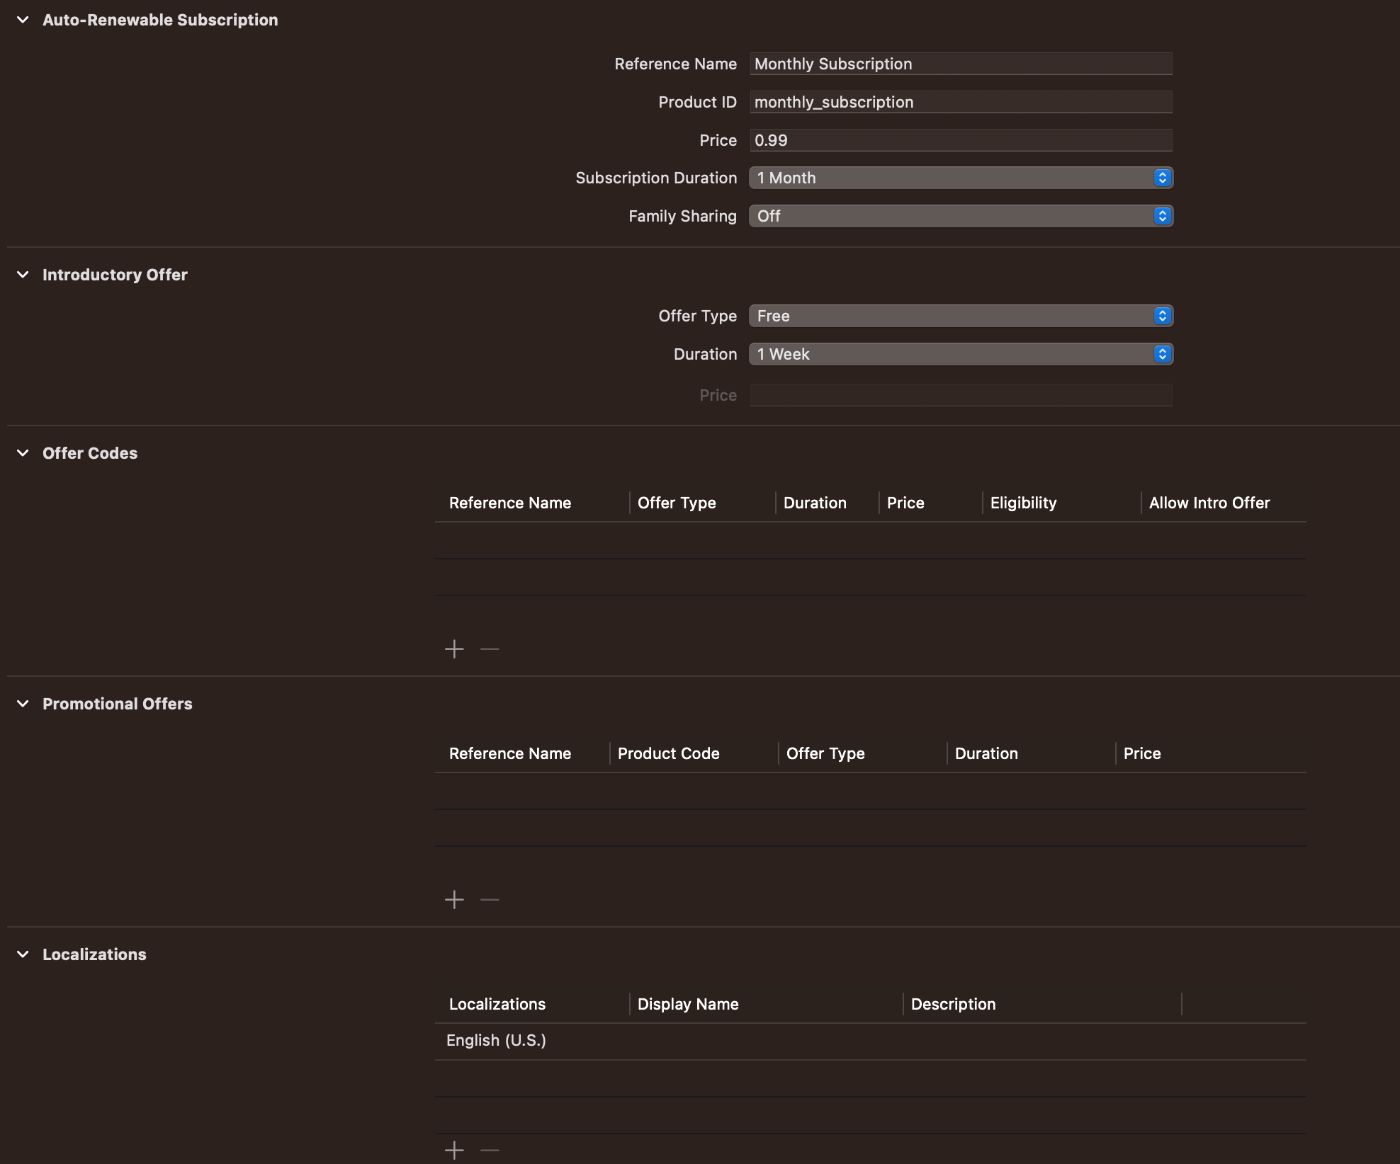
Set up your subscription products, including trial periods and eligibility states.
\

Pro Tip: You can also create a new configuration file to sync configuration file from App Store Connect and that way don’t need to setup all the products.
\
Simulate Different Scenarios:
In the Scheme Editor under Options, select the StoreKit configuration file.
Run your app in the StoreKit testing environment to simulate different scenarios:
Eligible for Free Trial:
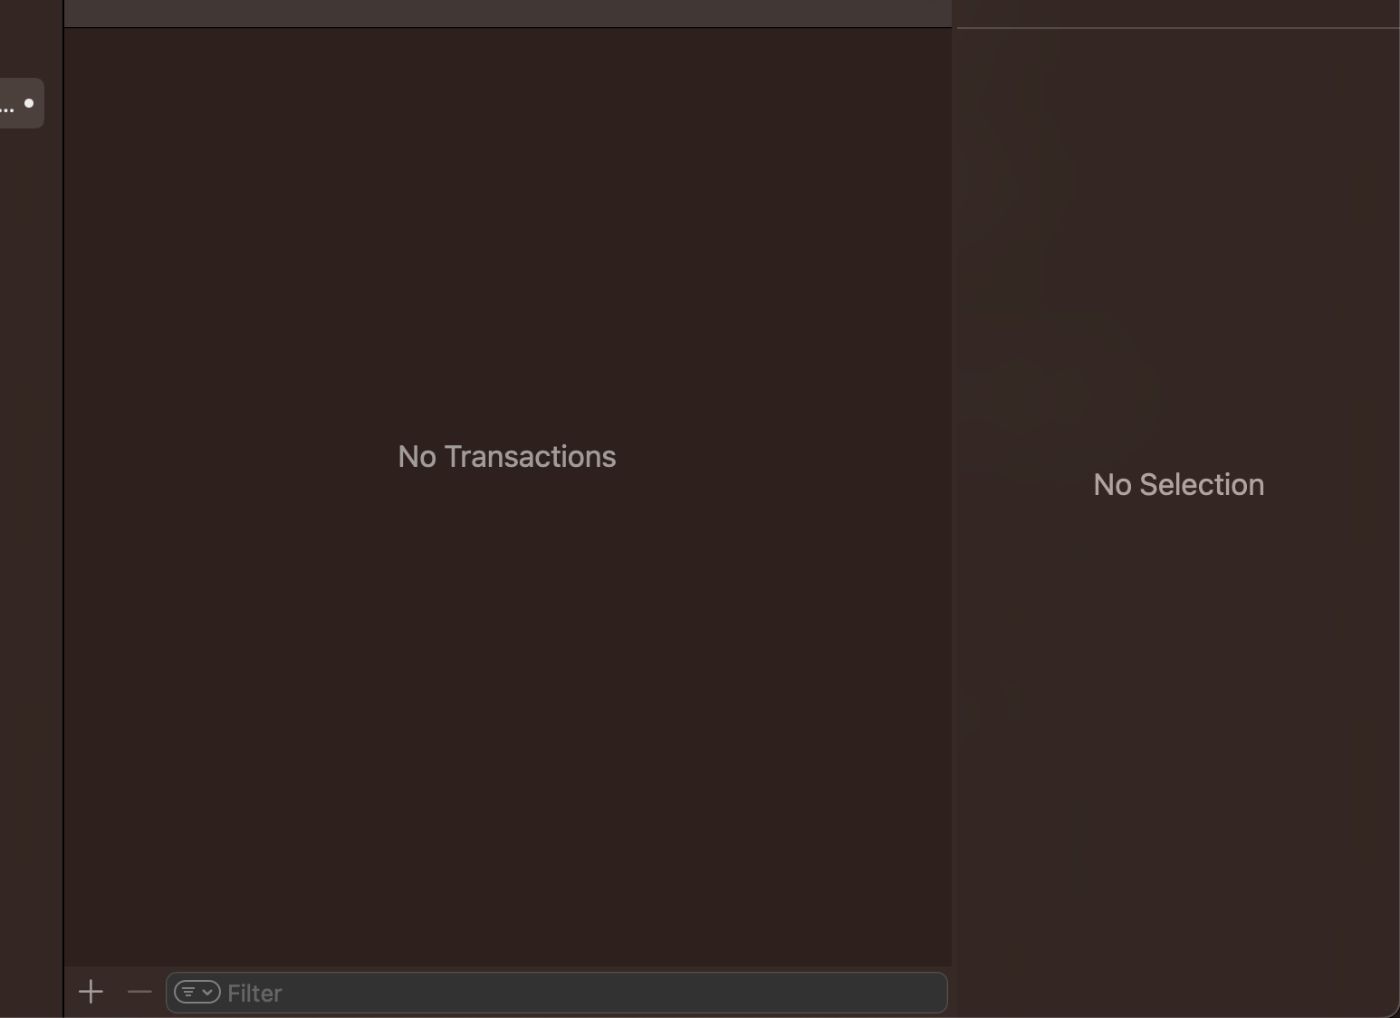
To simulate a free trial user, make sure to not have any transactions in the transaction manager.
To see the transaction manager. Go to Debug → StoreKit → Manage Transactions
\

Ineligible for Free Trial:
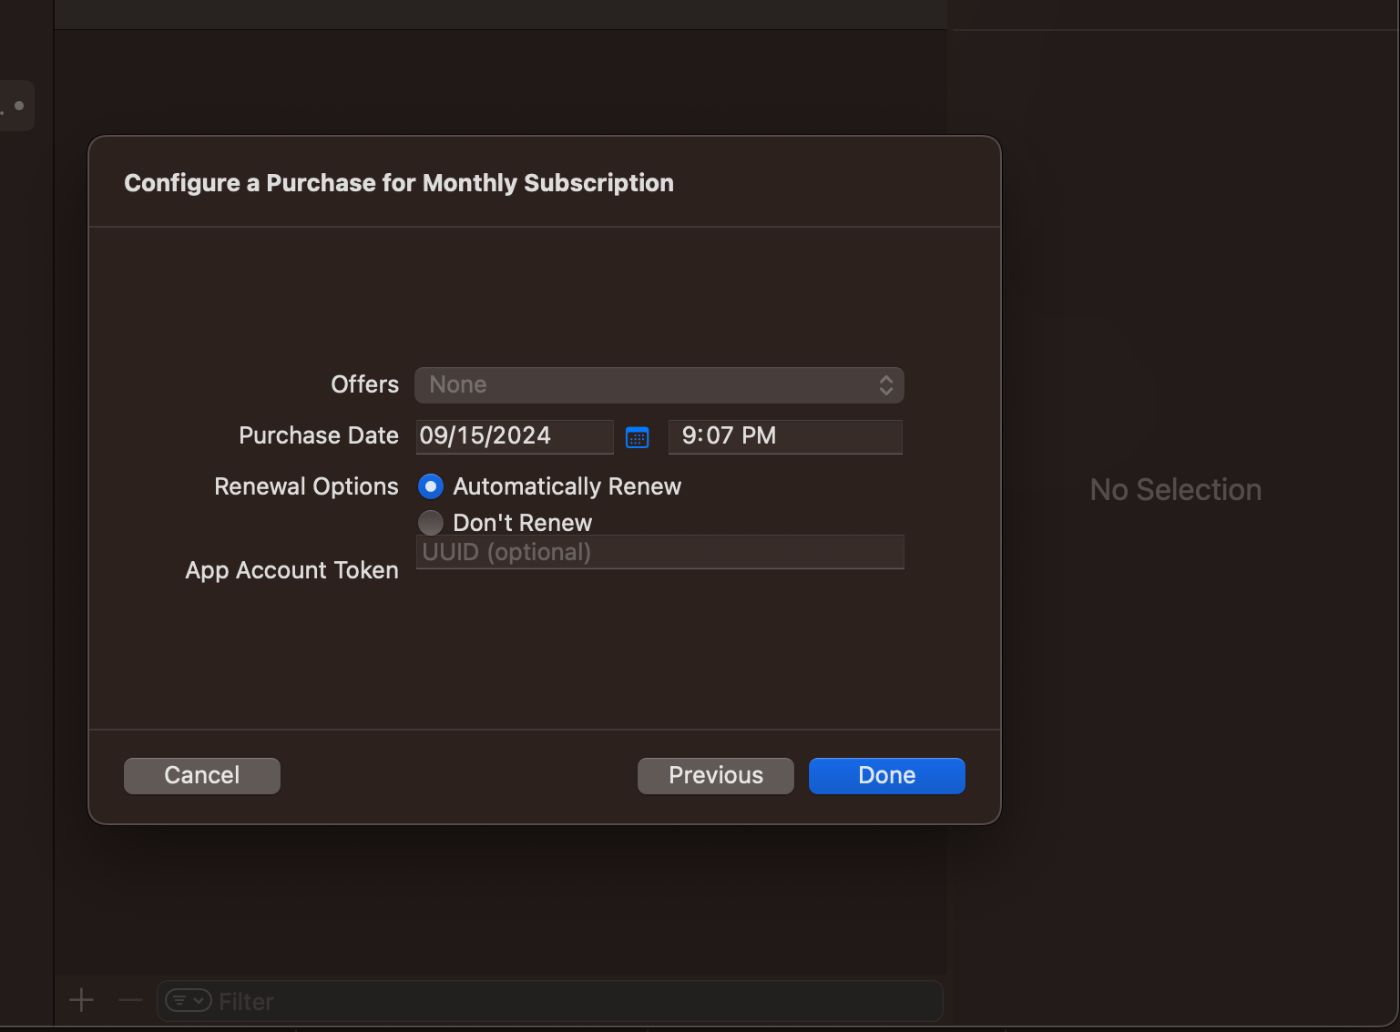
To simulate a user ineligible for a free trial. You can manually add a subscription from the transaction manager on the transaction manager. You can tap on the add button on the transaction manager screen and then select the transaction that you want to add. Here, I am trying to configure monthly subscription for the user. After adding that transaction and running the app again, you should see the trial eligibility marked as false.
\ Pro Tip: You can also include a UUID with the purchase, using this field to store the user’s ID. This way you can ensure which user made the purchase on your app. This information can later be retrieved from the user's transaction history.

Sandbox testing allows you to test your app's in-app purchases and subscriptions in an environment that mimics the App Store production environment while also giving you the freedom to mock a couple of edges cases like interrupted purchasing, family sharing, and simulating purchases made outside the app or in another device. It also allows you to
\ But before anything, here’s how to set up and use sandbox testing:
- Create a Sandbox Tester Account:
- Go to App Store Connect > Users and Access > Sandbox Testers.
- Create a new sandbox tester account by providing a unique email address, password, and other required details.
- Sign In with the Sandbox Tester Account:
- On your testing device, go to Settings > App Store > Sandbox Account.
- Sign in with the sandbox tester credentials you created.
- Run Your App in Sandbox Mode:
- Build and run your app on a physical device (sandbox testing doesn’t work in the simulator).
- Attempt to start the free trial or make a purchase using the sandbox tester account. The transaction will proceed in the sandbox environment, allowing you to test the complete flow, including eligibility for free trials, purchase success, cancellation, and other states.
- Test Different Scenarios:
First-Time User: Use the sandbox account for a first-time purchase to verify the free trial is correctly offered. To use the same sandbox account for consecutive attempts of QA, you can actually reset the eligibility for the user and also clear all the transactions for the sandbox account. You can do this from both App Store Connect or Settings
Cancelled Purchase: Test how the app handles a user canceling the purchase during the flow.
Network Failure: Simulate network issues by disconnecting and reconnecting the network to see how the app handles failed transactions.
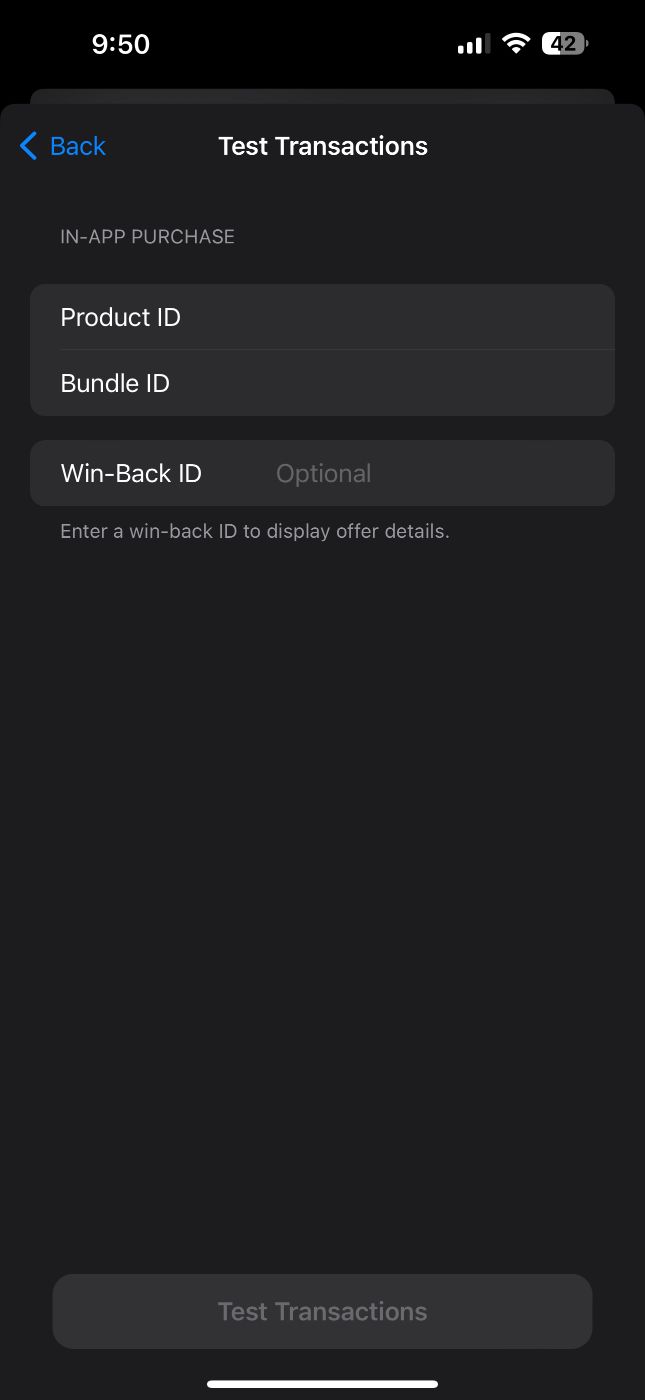
Free Trial Ineligible: This is a bit tricky but not impossible. First, you want to Settings → App Store → Click on the sandbox account → Tap Manage. Here you should be able to add a transaction manually to the sandbox account for the user. Now, you should be able to test trial ineligibility for the user.
\
\

Pro Tip: An Apple account cannot have multiple active subscriptions, so two different users cannot make separate purchases on the app using the same Apple ID. Be sure to check you app for this user case.
Referenceshttps://developer.apple.com/documentation/storekit
https://developer.apple.com/documentation/xcode/setting-up-storekit-testing-in-xcode/
https://developer.apple.com/app-store-connect/
\ \
- Home
- About Us
- Write For Us / Submit Content
- Advertising And Affiliates
- Feeds And Syndication
- Contact Us
- Login
- Privacy
All Rights Reserved. Copyright , Central Coast Communications, Inc.