and the distribution of digital products.
How to Generate EKS Worker Node Image - Windows 2019 Update 2004/20H2
DevOps teams face numerous challenges during the modernization of CI/CD build systems. One such challenge arises when teams continue to build Windows-based applications that require older versions of Windows. In these cases, a Windows Server 2019 Update 2004/20H2 container can be used to help the team build these applications without needing many code changes.
\ Since AWS does not provide an AMI for Windows Server 2019 Update 2004/20H2, we must create one manually so that it can be used to create nodes in the EKS cluster, which can then be integrated into the CI/CD pipeline.
\ Below are the steps to generate a custom image for Windows Server 2019 Update 2004/20H2. In this guide, we will generate the image for Kubernetes v1.27.
Prerequisites:- AWS Account
- An IAM user with administrative permissions or a user with full permissions for EC2 and AMI management
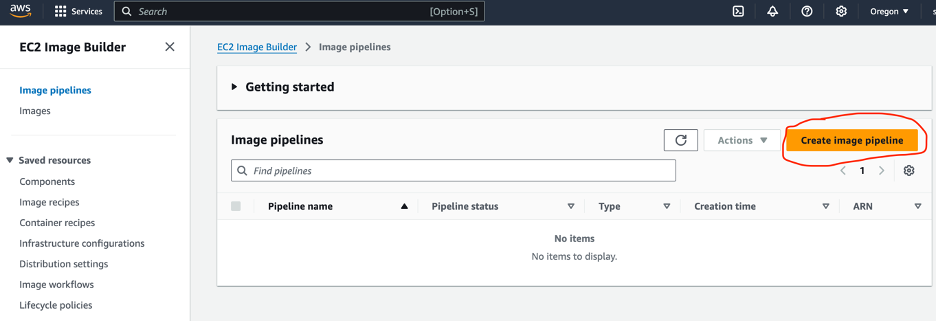
Log in to the AWS account where you want to create the AMI, using a user with the necessary permissions to create AMIs. Once logged in, search for the Image Builder service, click on EC2 Image Builder, and start by clicking Create Image Pipeline.

\
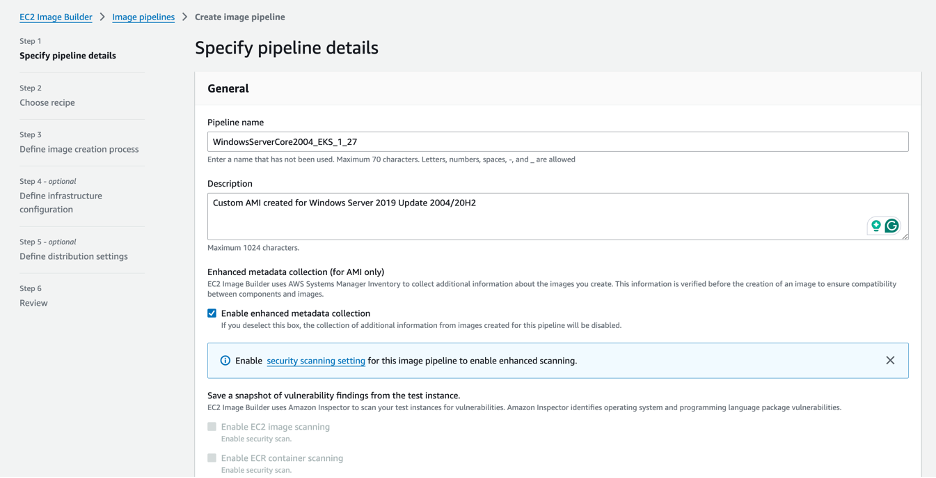
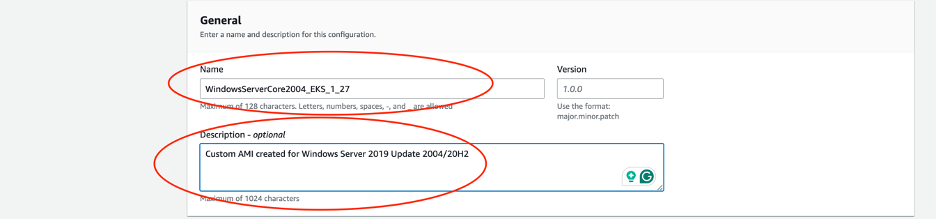
\ Step 1: Define the name and description of the AMI, and add tags that will be associated with it.
\ Note: Using tags has many advantages, including better management, organization, and automation.
\
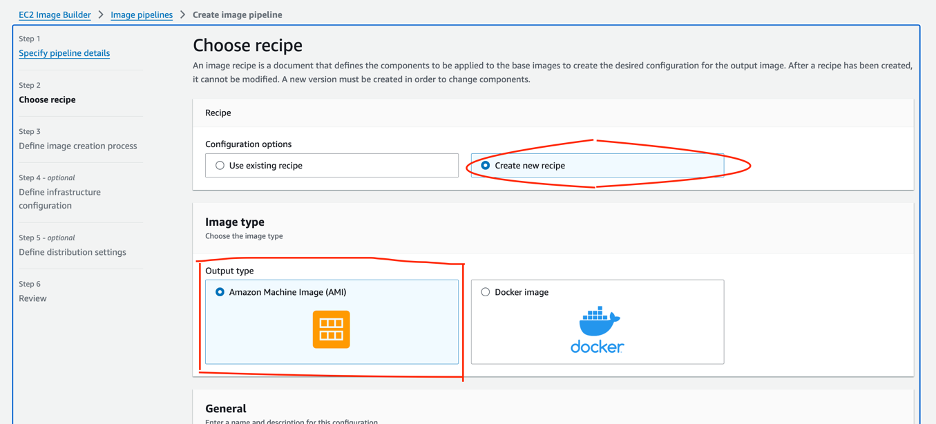
\ Step 2: Choose the recipe for the AMI. You will have two options: Use Existing Recipe or Create New Recipe. If you already have a recipe with the desired configuration, select Use Existing Recipe. For this documentation, we will proceed with Create New Recipe since we are assuming that no existing recipe is available.
\ Selecting Create New Recipe opens up several additional options to configure:
- Selecting Image Type (What type of image output is required):
\
- Name and Description for this configuration
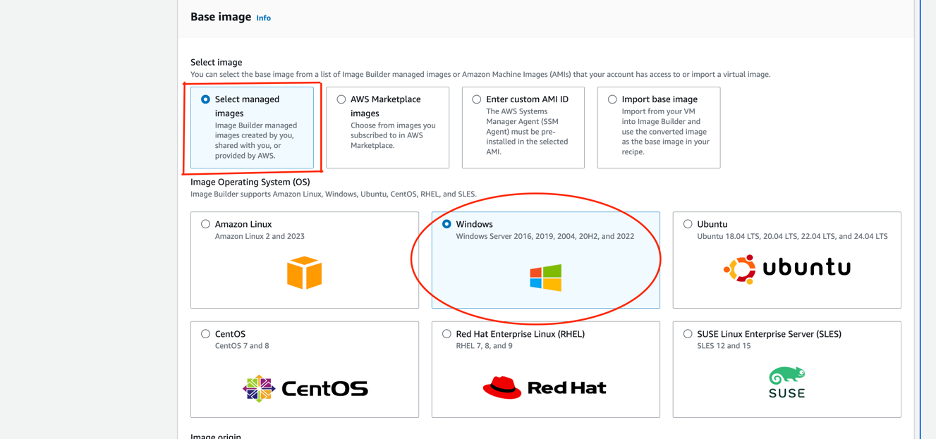
- Base Image:
\
- Instance Configuration
- Working Directory (can be left as default)
- Components:
\ Now that we have defined all the options, let's go through them one by one. After selecting Create New Recipe, we need to choose the output type we are trying to achieve from this Image Builder — whether it’s an AMI or a Docker image. Since we need a Windows AMI for the EKS node, let's select Amazon Machine Image (AMI).
\
\ Let's use the same name and description for the AMI that we defined in Step 1, as we are working within the same image builder pipeline.
\ Now it's time to select the Base Image in the "Select Image" step. The first step is to decide what type of Base Image we need. There are four available options—let's review each one and when to choose them, so we can determine which is best for our needs.
- Select managed images: Choose this option if you need a stable, secure, and up-to-date base image managed by AWS or your team.
- AWS Marketplace images: Choose this option if you need an image with specific software or configurations that is already available in the AWS Marketplace.
- Enter custom AMI ID: Choose this option if you already have a custom AMI in your AWS account with specific configurations, applications, or an operating system that you want to use as the base for a new image.
- Import base image: Choose this option if you are migrating from a virtual machine (VM) environment to the cloud and want to import a VM image from your existing environment.
\ For this process, we are choosing the “Select Managed Images” option since we need a stable, secure, and up-to-date base image. Selecting this option opens up a few more choices, so let's go through them one by one.
\ Next, we need to select the Operating System. Since we are creating this Image Builder for Windows Server 2019 Update 2004/20H2, let's select Windows OS.
\ Next is the Image Origin stage, where you have three options to choose from:
- Quick start (Amazon-managed): Select this if you don’t have any images created yet and want to use an Amazon-managed image.
- Images owned by me: Select this if you already have an image created using Image Builder.
- Images shared with me: Select this if someone has shared an image with you that was created using Image Builder.
\ I am choosing Images owned by me since I already created an image when the EKS cluster was on version 1.23, which supported Windows Server 2004.
\ Note: If you don’t have a pre-existing image of Windows Server 2004, it is best to create an AMI. For more information, refer to this link: Importing a VM as an Image. This way, you can select "Images owned by me" and choose the AMI that you created.
\

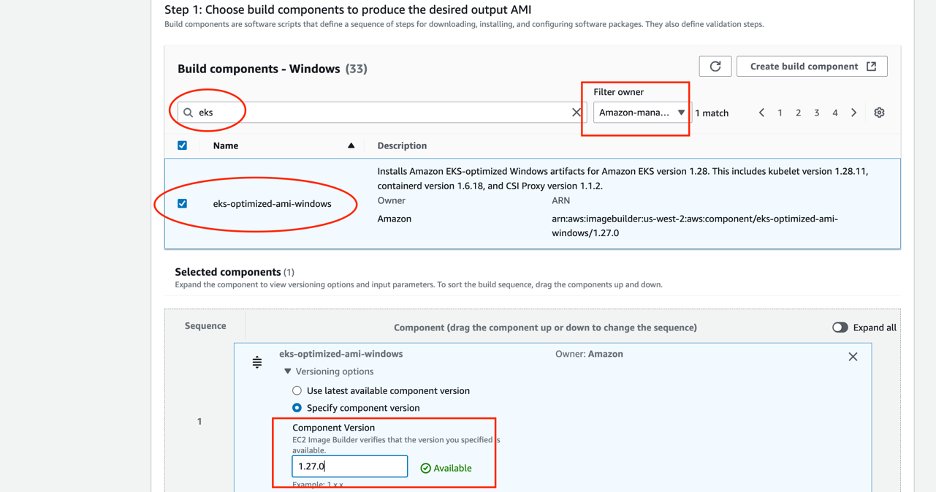
\ For Auto-Versioning select “Use selected OS version”

\ Keep the remaining settings as they are, and move on to the Build components selection. In the search box, search for "eks" and filter with Amazon-Managed. Then, check the component and specify the version (eg: 1.27.0); otherwise, it will build the latest available version. Make sure the "Available" sign turns green before proceeding further.
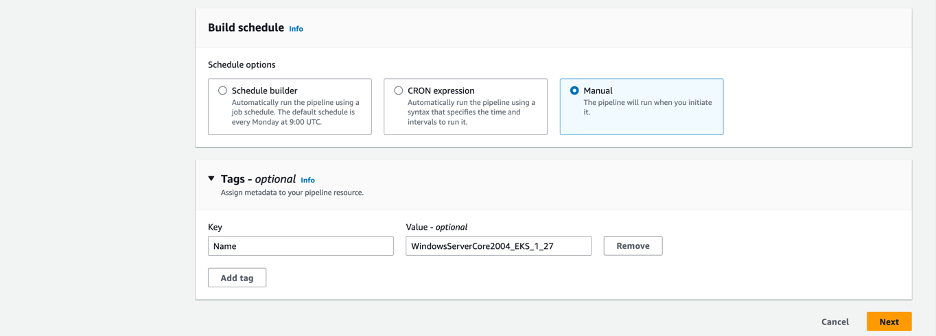
\ Keep everything else default and Add Tags and click Next.
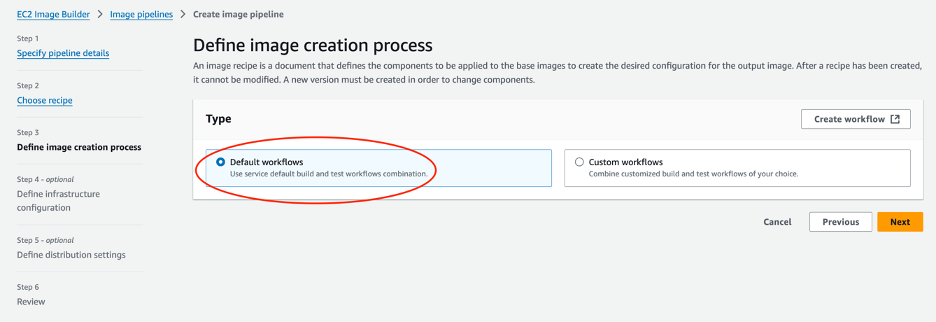
\ Step 3: The next step is “Define Image Creation Process”. In this, you have 2 options to choose from Default workflows or Custom workflow, we will go with default option “Default workflows” and click Next.
\
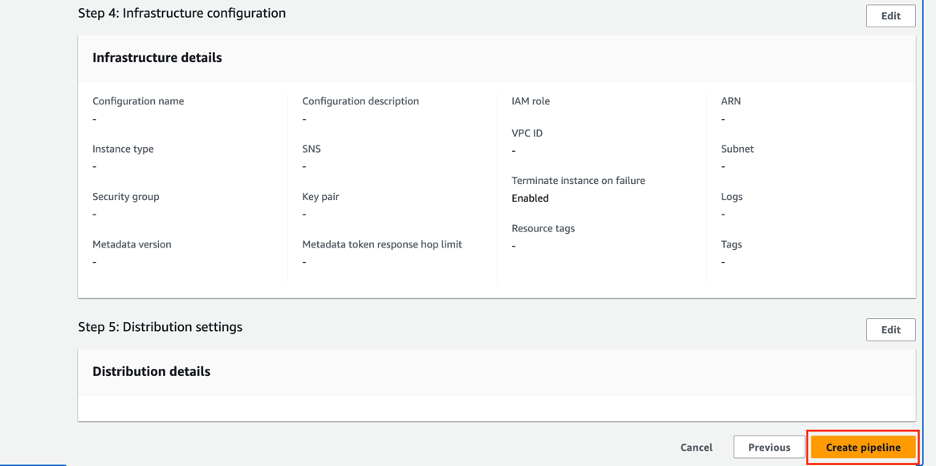
\ Step 4: The next step is "Define infrastructure configuration" Although this step is optional, it is best to either select "Use Existing Infrastructure Configuration" if one is already configured, or choose "Create infrastructure configuration using service defaults"
Step 5: The next step is "Create distribution settings" Select "Create distribution settings using service defaults" and click Next.
Step 6: The final step is to review all the configurations and click Create Pipeline.
\ This will create the Image Builder pipeline. Once the pipeline is created, it can be used in EKS to create a Windows Server 2019 Update 2004/20H2 node group.