and the distribution of digital products.
Why Pay for the Cloud? Build Your Own with Raspberry Pi and Open Media Vault
Are you concerned about privacy or considering using a Raspberry Pi you bought half a decade ago and still trying to use somewhere more permanent… you are on the right page! Turn your Raspberry Pi into “your own Cloud Server” with no compromise in storage space, features, privacy and customizability using Open Media Vault(OMV)
First of all, what is NAS?Network-attached storage (NAS) is a dedicated file storage system connected to a network that allows multiple users and devices to access, store, and share data from a centralized location. It can be used for personal, corporate, or both purposes.
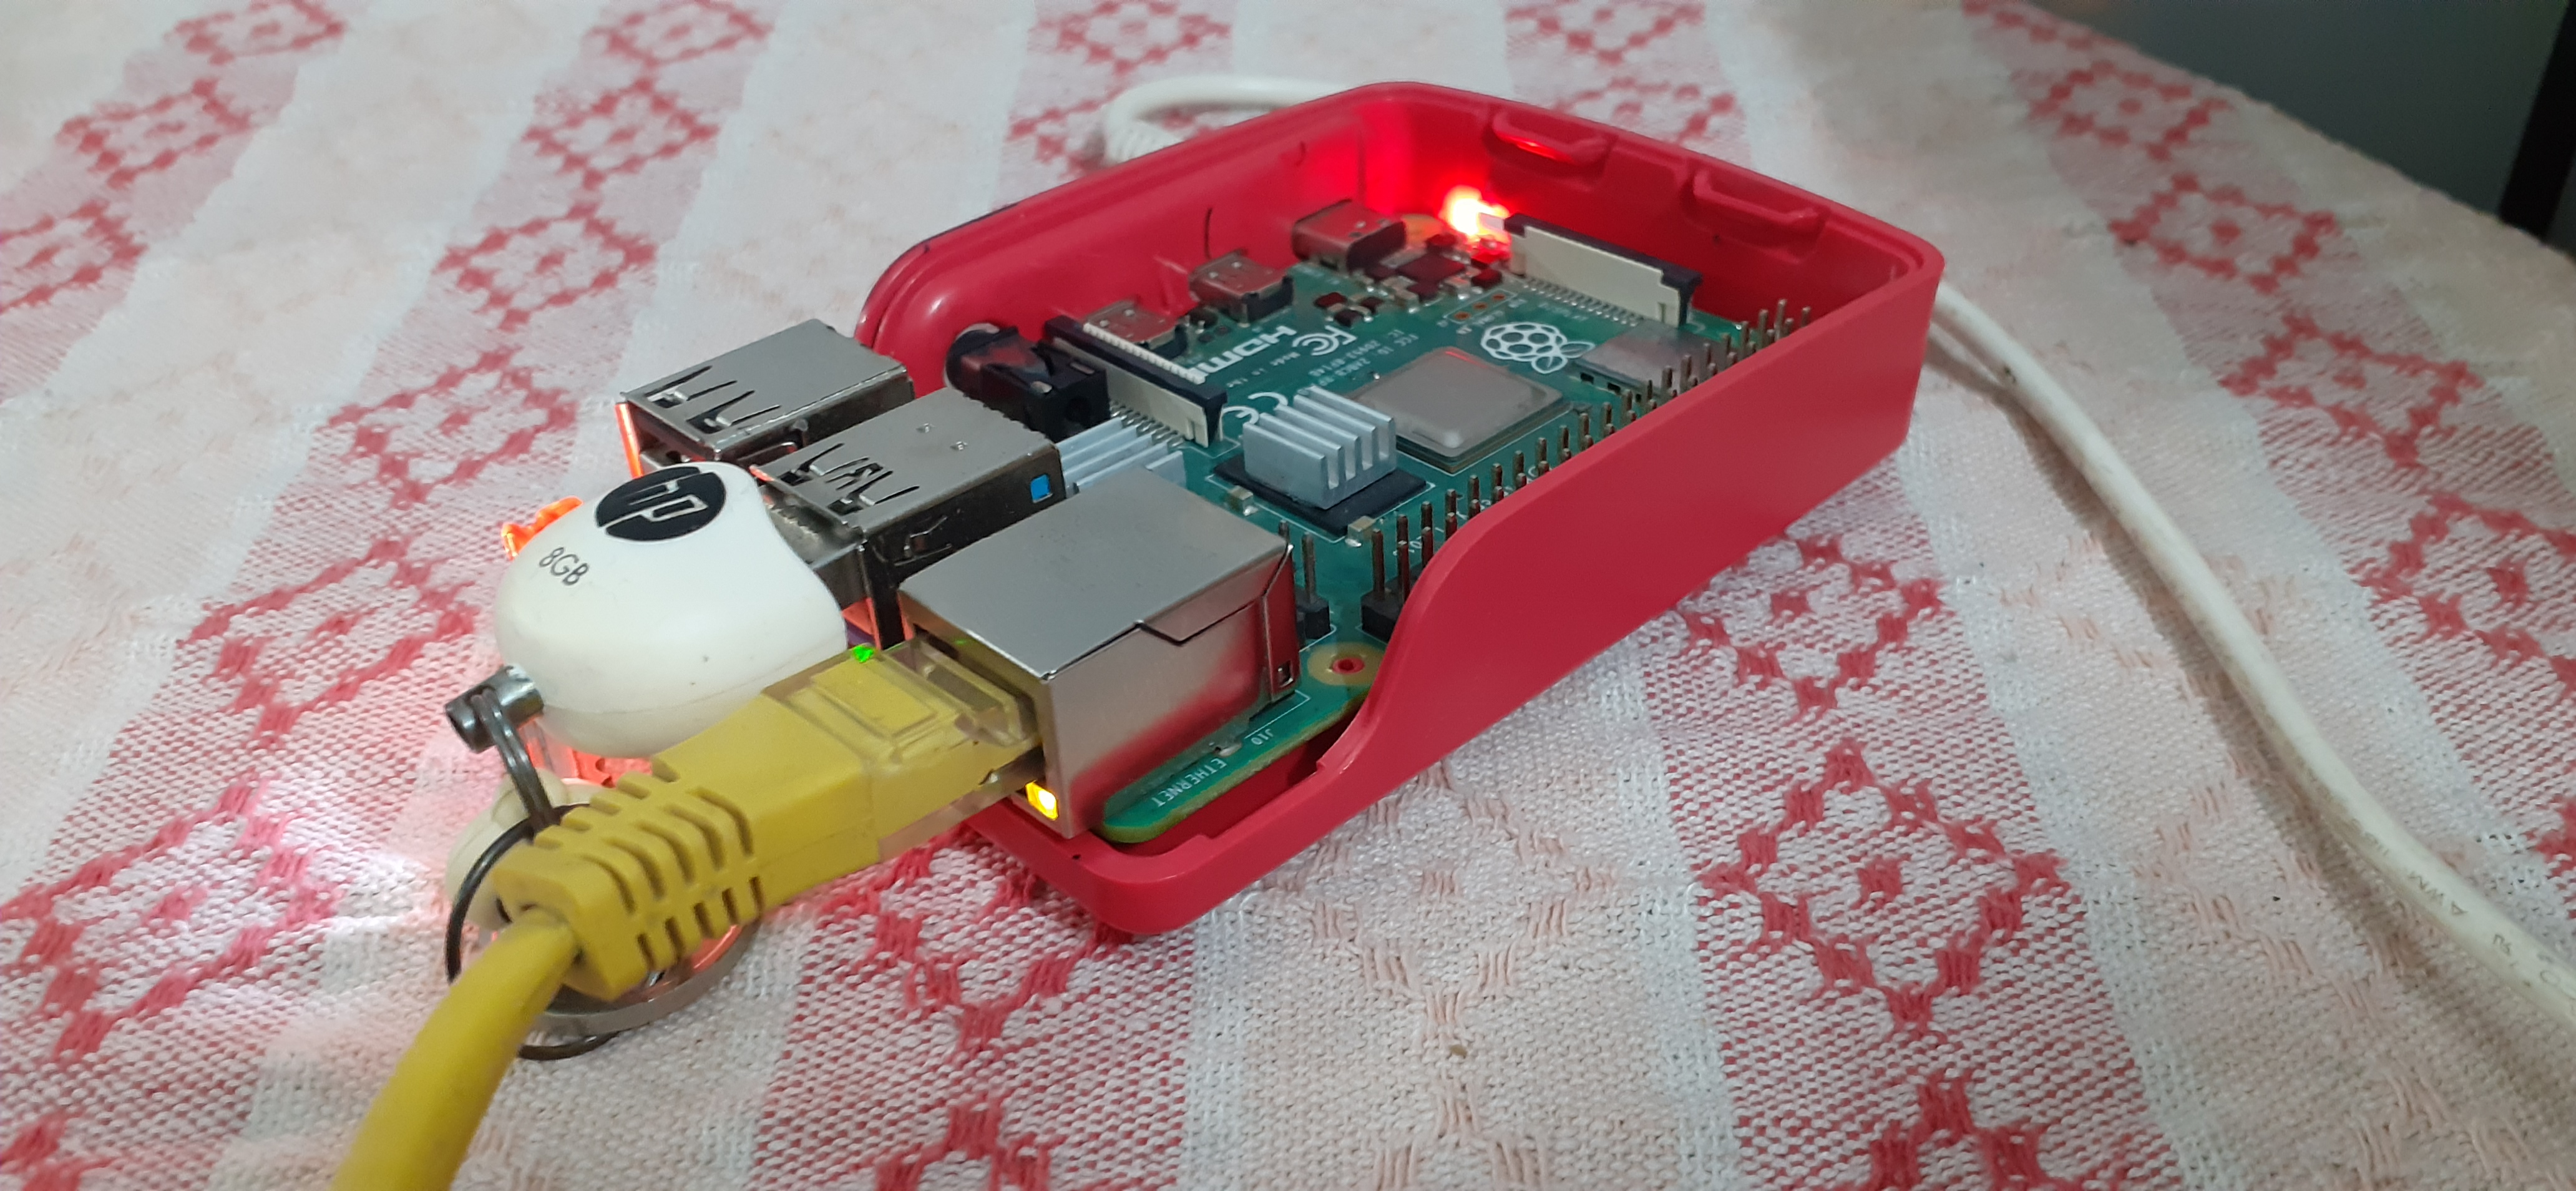
Pre-requisites1)Raspberry Pi
2)SD card
3)PC / Mac
4)Router
5)A Storage device(SSD, SD, Hard Disk,or Flash Drive)
6)Ethernet Cable
:::info I am using Windows… The setup of Open Media Vault/Installation of Raspberry Pi imager/set up NAS in File Explorer may be different for MacOS and Linux.
:::
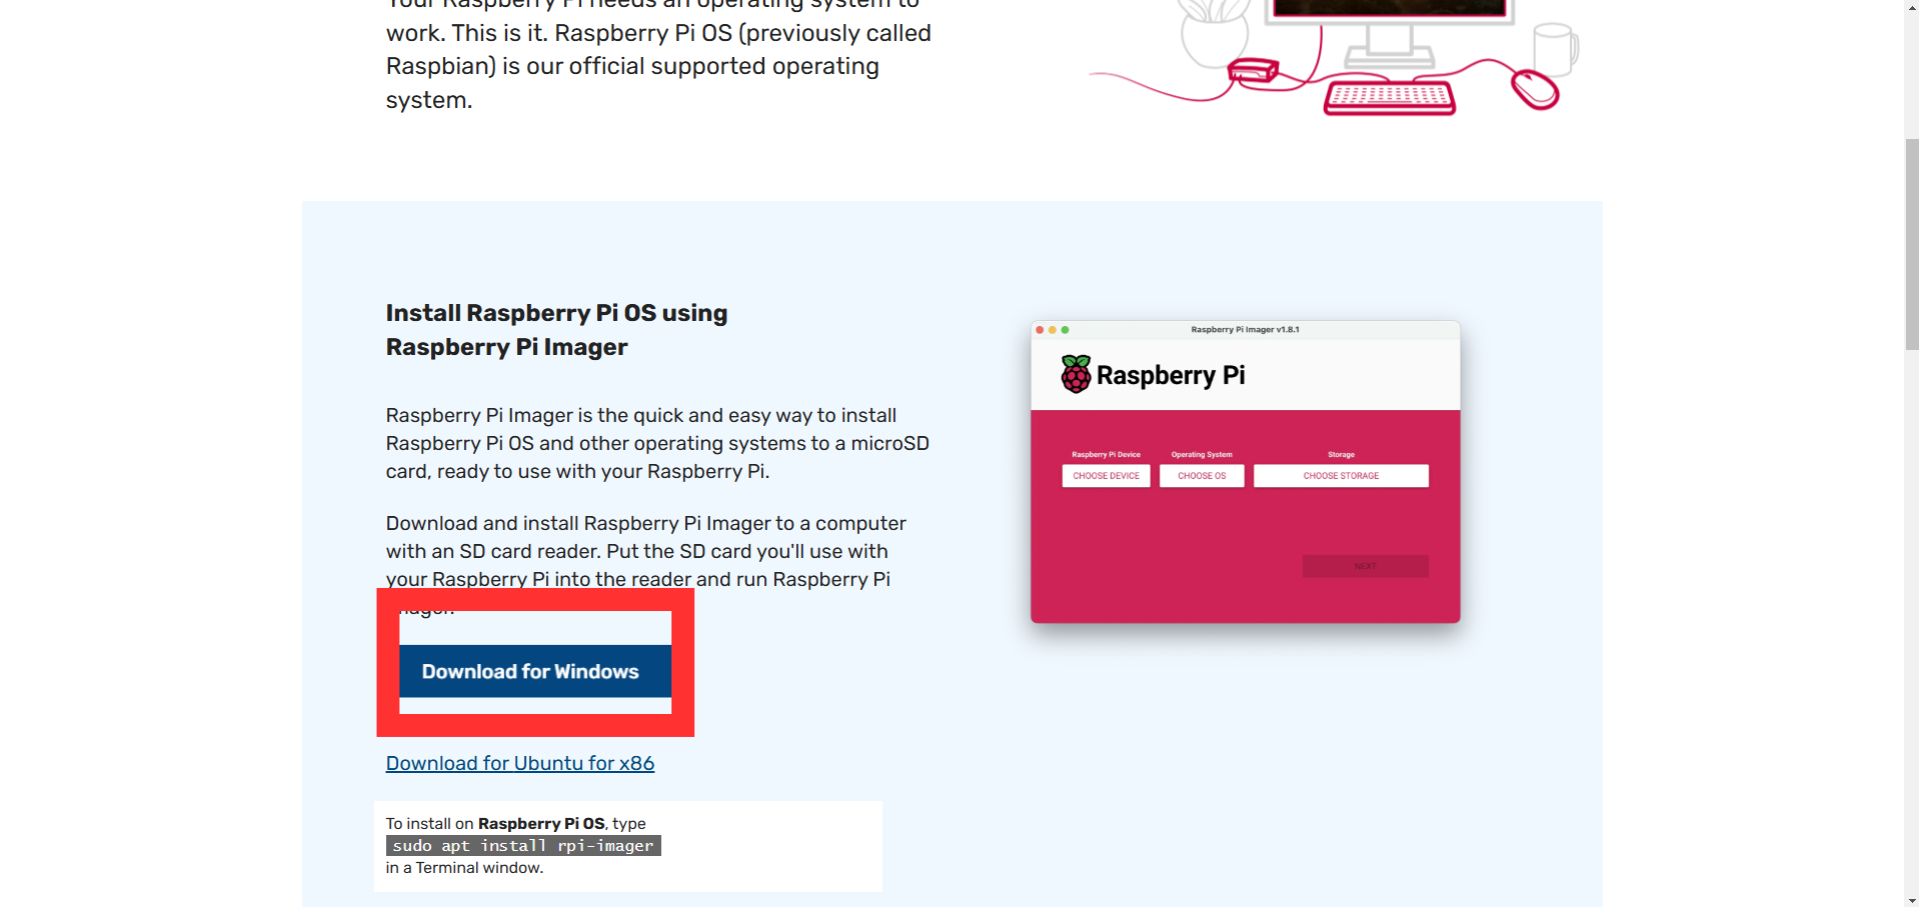
Baking the Pi 1. Download the Raspberry Pi ImagerOpen your web browser and go to the official Raspberry Pi website
Click on "Download for Windows”
\
- Once the installer is downloaded, locate it in your Downloads folder (it will be named something like imager-setup.exe).
- Double-click the file to run the installer.
- Follow the on-screen instructions to complete the installation. Typically, this involves:
- Agreeing to the terms and conditions.
- Selecting the installation location (or using the default location).
- Click Install to start the process.
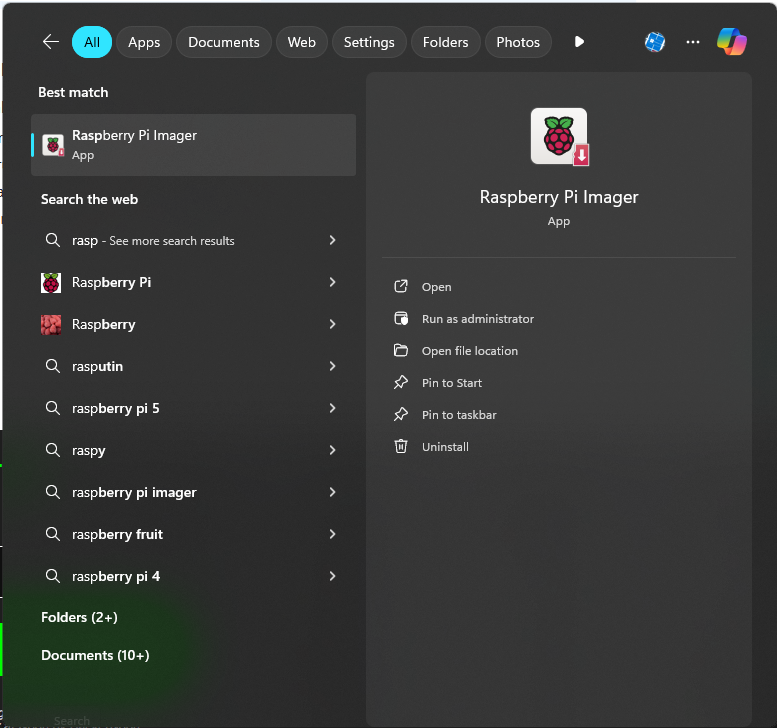
Search in the search menu for the imager by typing its name and launching it.
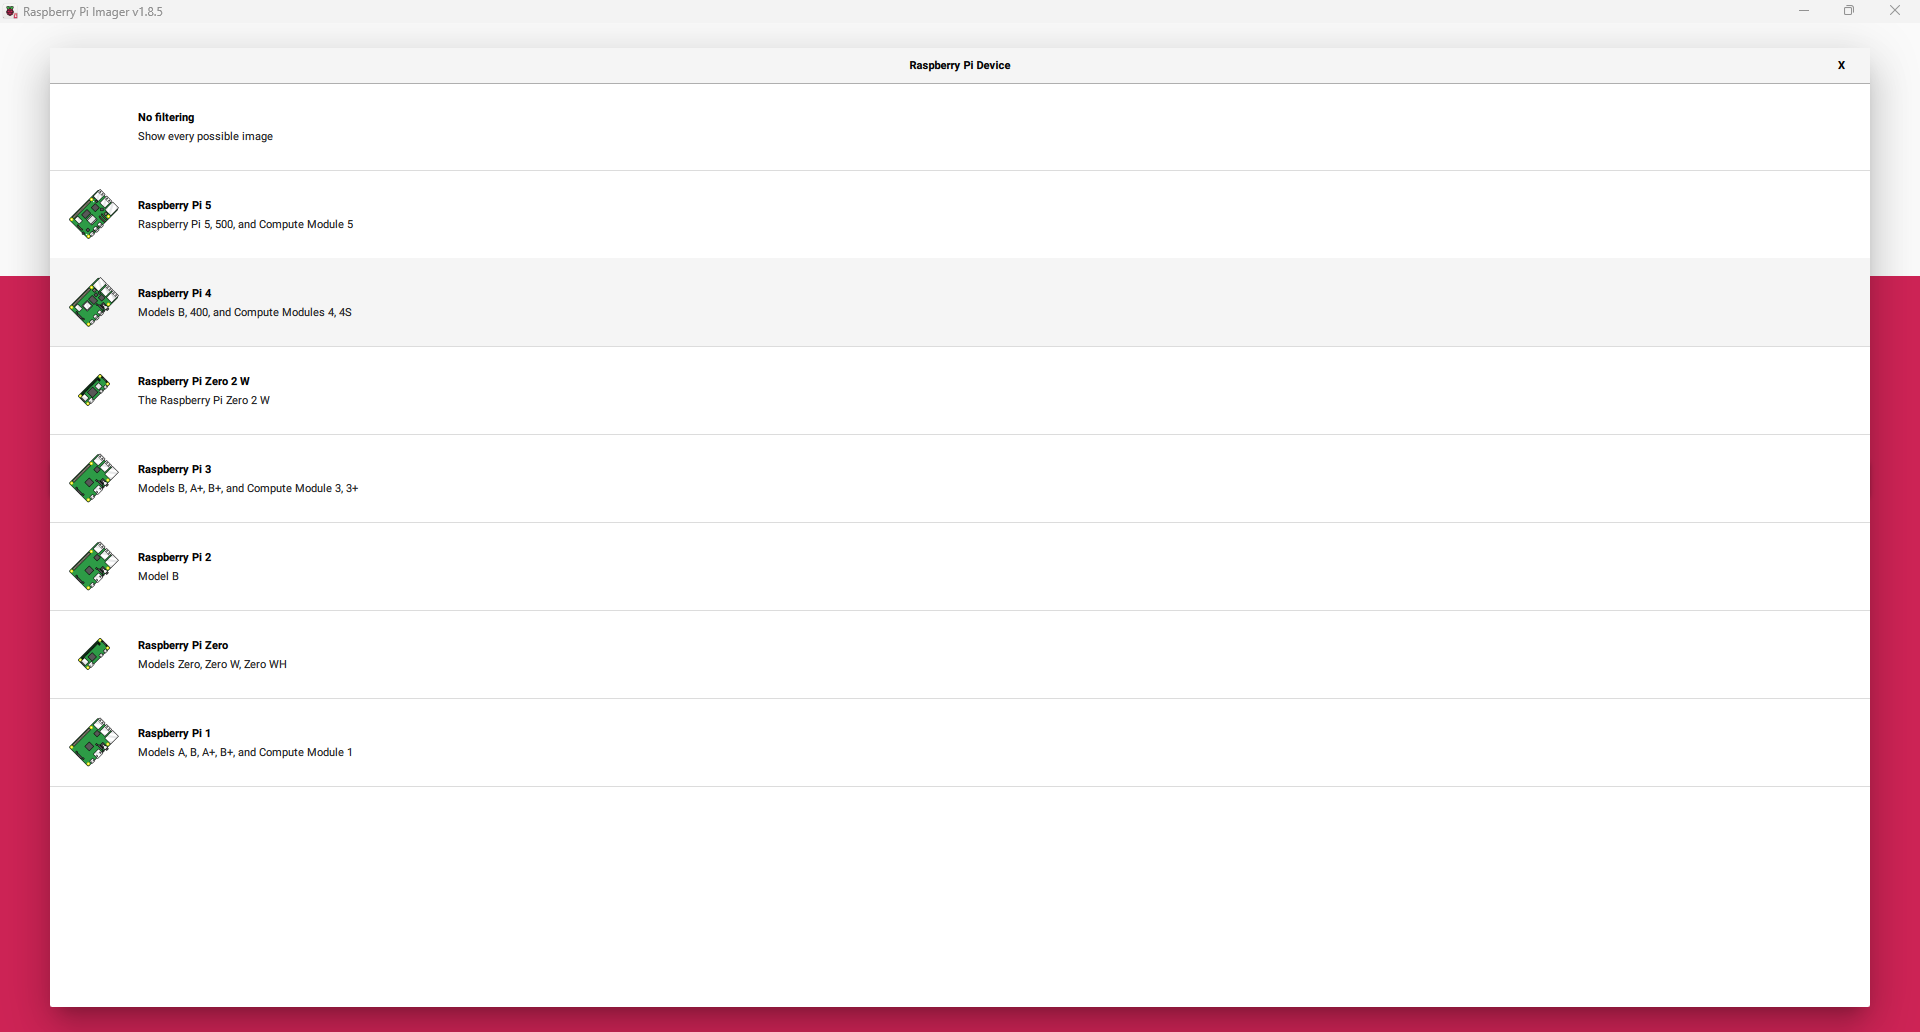
Burn the Image- Insert a microSD card or USB drive into your computer.
- Select the version of your Raspberry Pi.
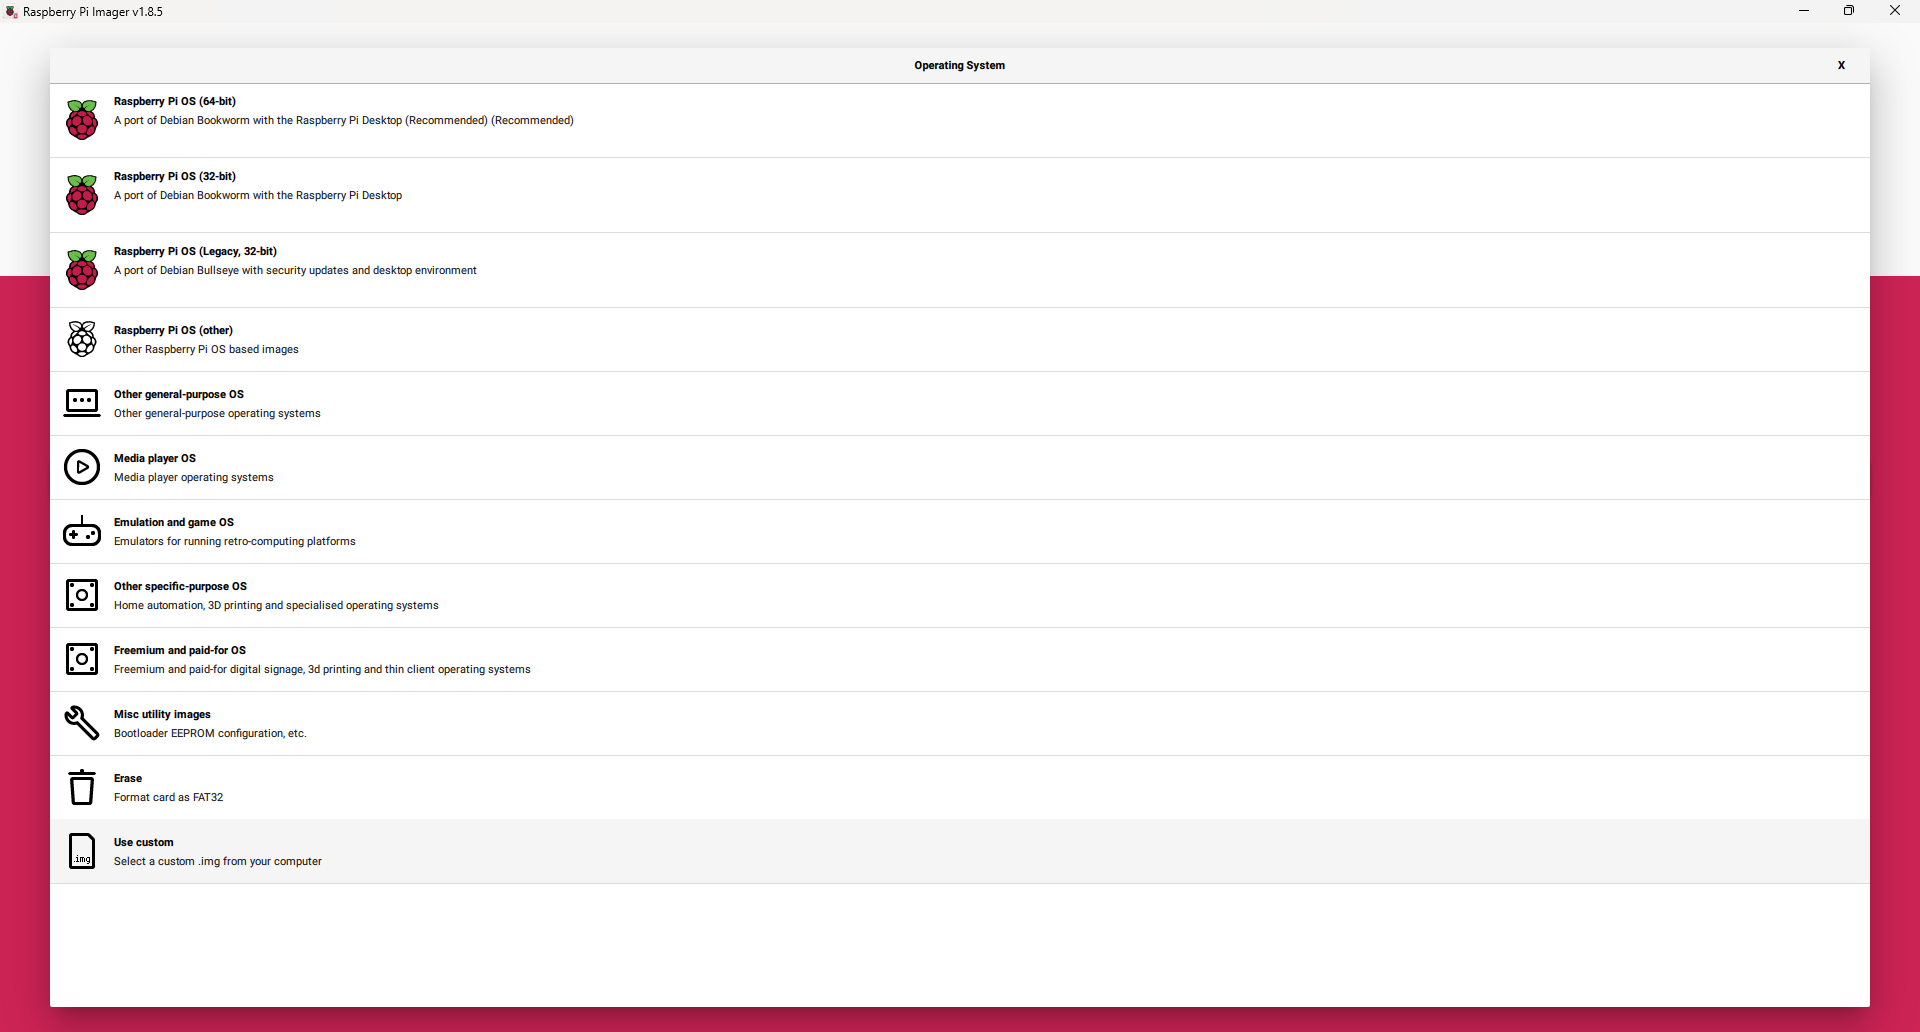
- Select the Raspberry Pi Lite OS
- Select the storage media like an SD card or Flash Drive where you want to create the image.
:::warning Be cautious not to select one of your SSDs or hard drives in your computer by mistake. Additionally, if the storage device you plan to use for the project contains important data, make sure to back it up beforehand, as all data on the device will be erased.
:::
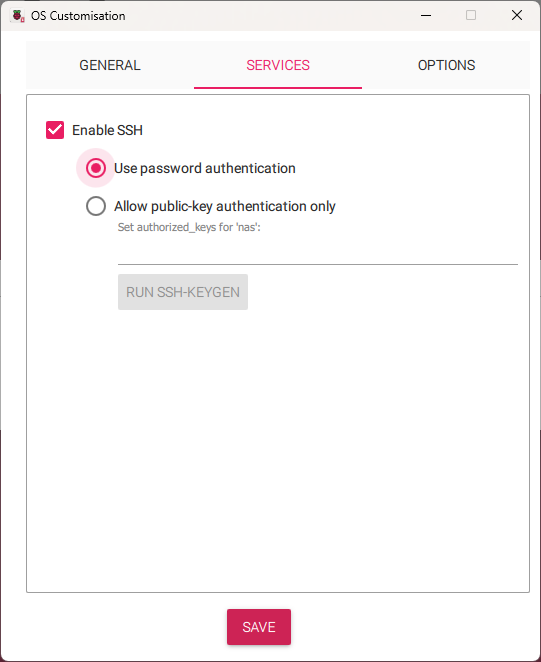
- Click on write and enable and edit the setting with local, username and password, wireless network, and most importantly SSH(as we are going to the headless pi or without using the monitor or keyboard)
- Wait patiently until it is done.
- Take your Raspberry Pi, and put the storage media(that has the os on it) into their respective slot.s
- Connect the ethernet cable to the Raspberry Pi
- Power it on
:::info Please note down the IP address and also ensure the computer and Raspberry Pi are connected to the same network.
:::
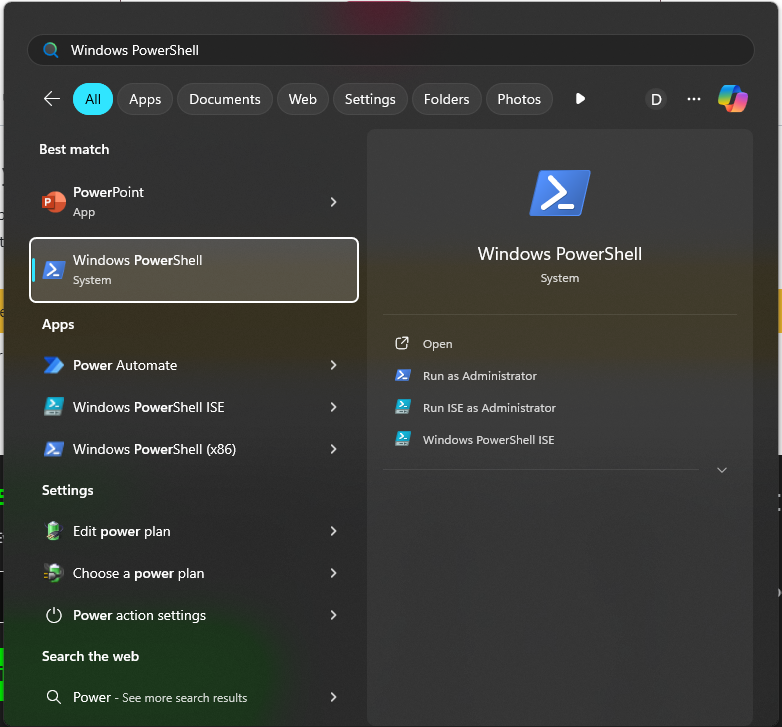
Power on your PC search Powershell and open it
\
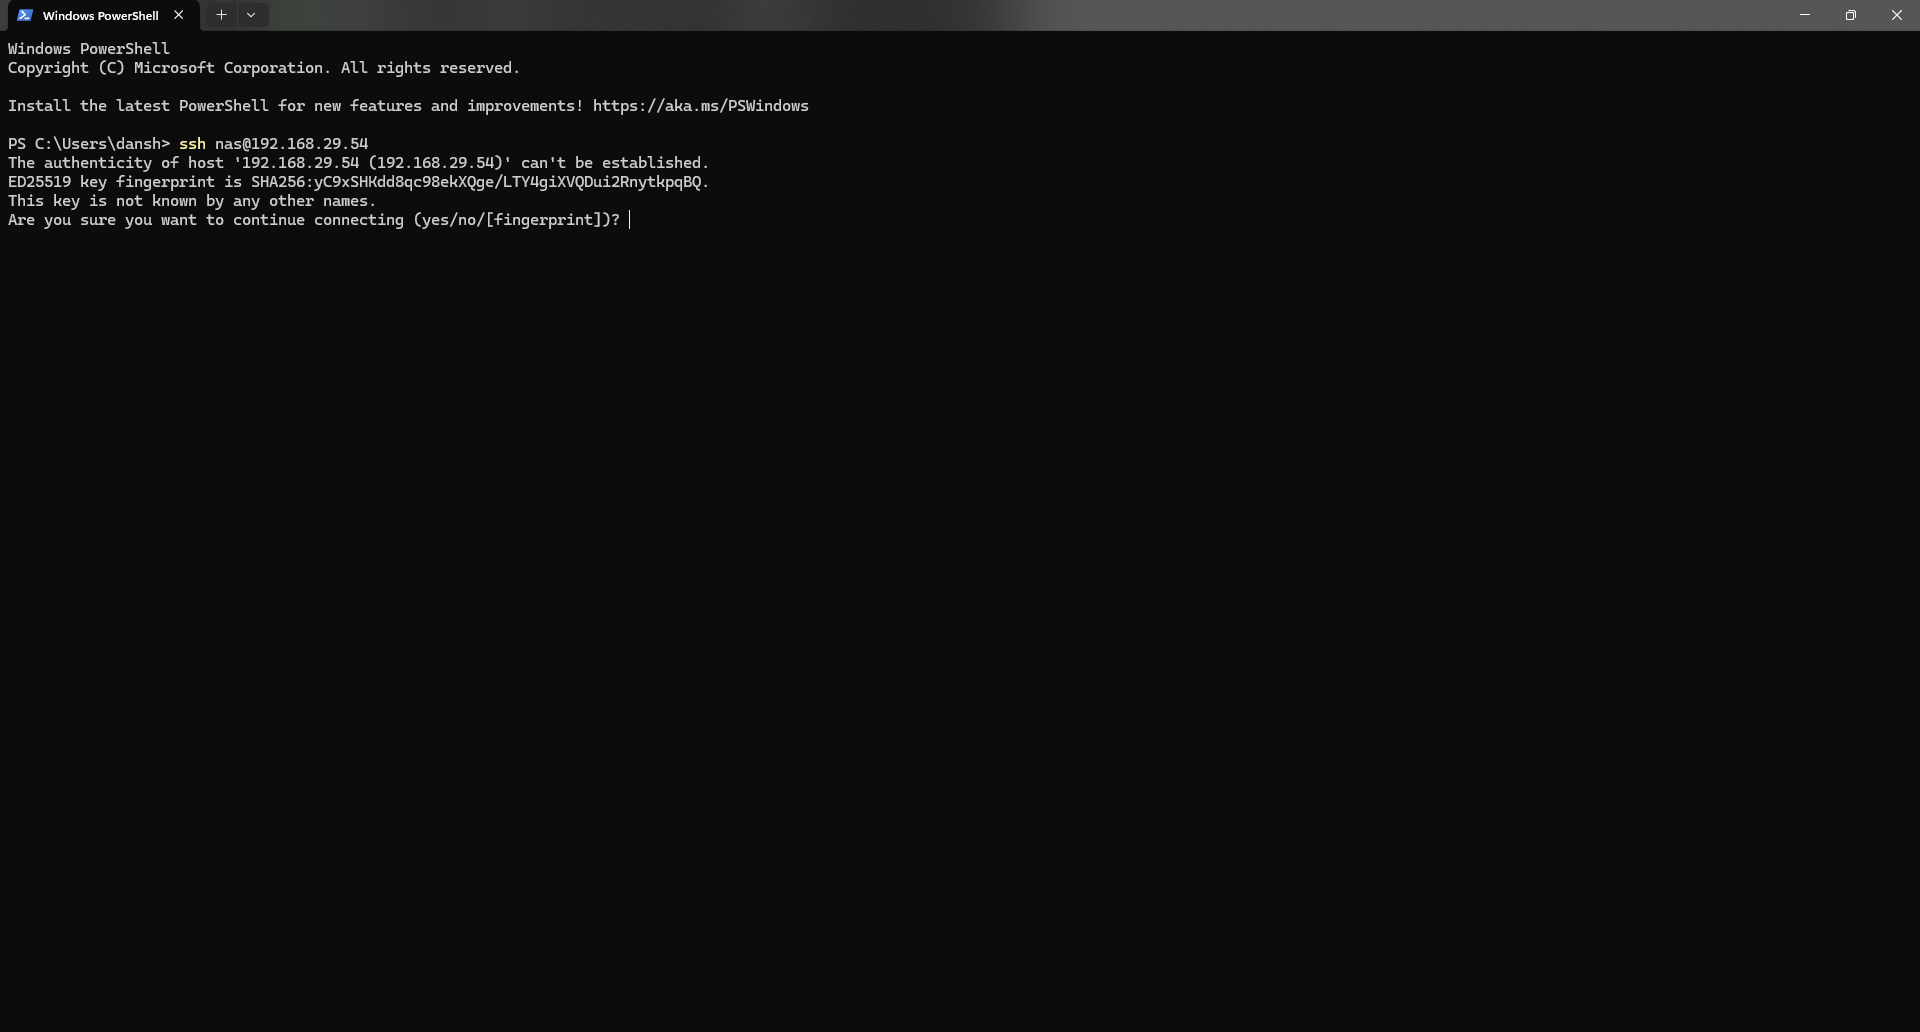
Type the following code in the PowerShell
:::info change the username to the username you set on the settings menu while writing the image and write the IP address which you noted earlier
:::
\

:::warning If you get something like this:-
“
@@@@@@@@@@@@@@@@@@@@@@@@@@@@@@@@@@@@@@@@@@@@@@@@@@@@@@@@@@@ \n @ WARNING: REMOTE HOST IDENTIFICATION HAS CHANGED! @ \n @@@@@@@@@@@@@@@@@@@@@@@@@@@@@@@@@@@@@@@@@@@@@@@@@@@@@@@@@@@ \n IT IS POSSIBLE THAT SOMEONE IS DOING SOMETHING NASTY! \n Someone could be eavesdropping on you right now (man-in-the-middle attack)! \n It is also possible that a host key has just been changed. \n The fingerprint for the ED25519 key sent by the remote host is \n SHA256:yC9xSHKdd8qc98ekXQge/LTY4giXVQDui2RnytkpqBQ. \n Please contact your system administrator. \n Add correct host key in C:\\Users\\user/.ssh/knownhosts to get rid of this message. \n Offending ED25519 key in C:\\Users\\user/.ssh/knownhosts:4 \n Host key for 192.168.xx.xx has changed and you have requested strict checking. \n Host key verification failed.
“
Do not get scared and type this in the power shell:-
notepad C:\Users\user\.ssh\known_hostsand delete the first line and again try the command
:::
\ You will get output something like this:-
Type yes and continue.
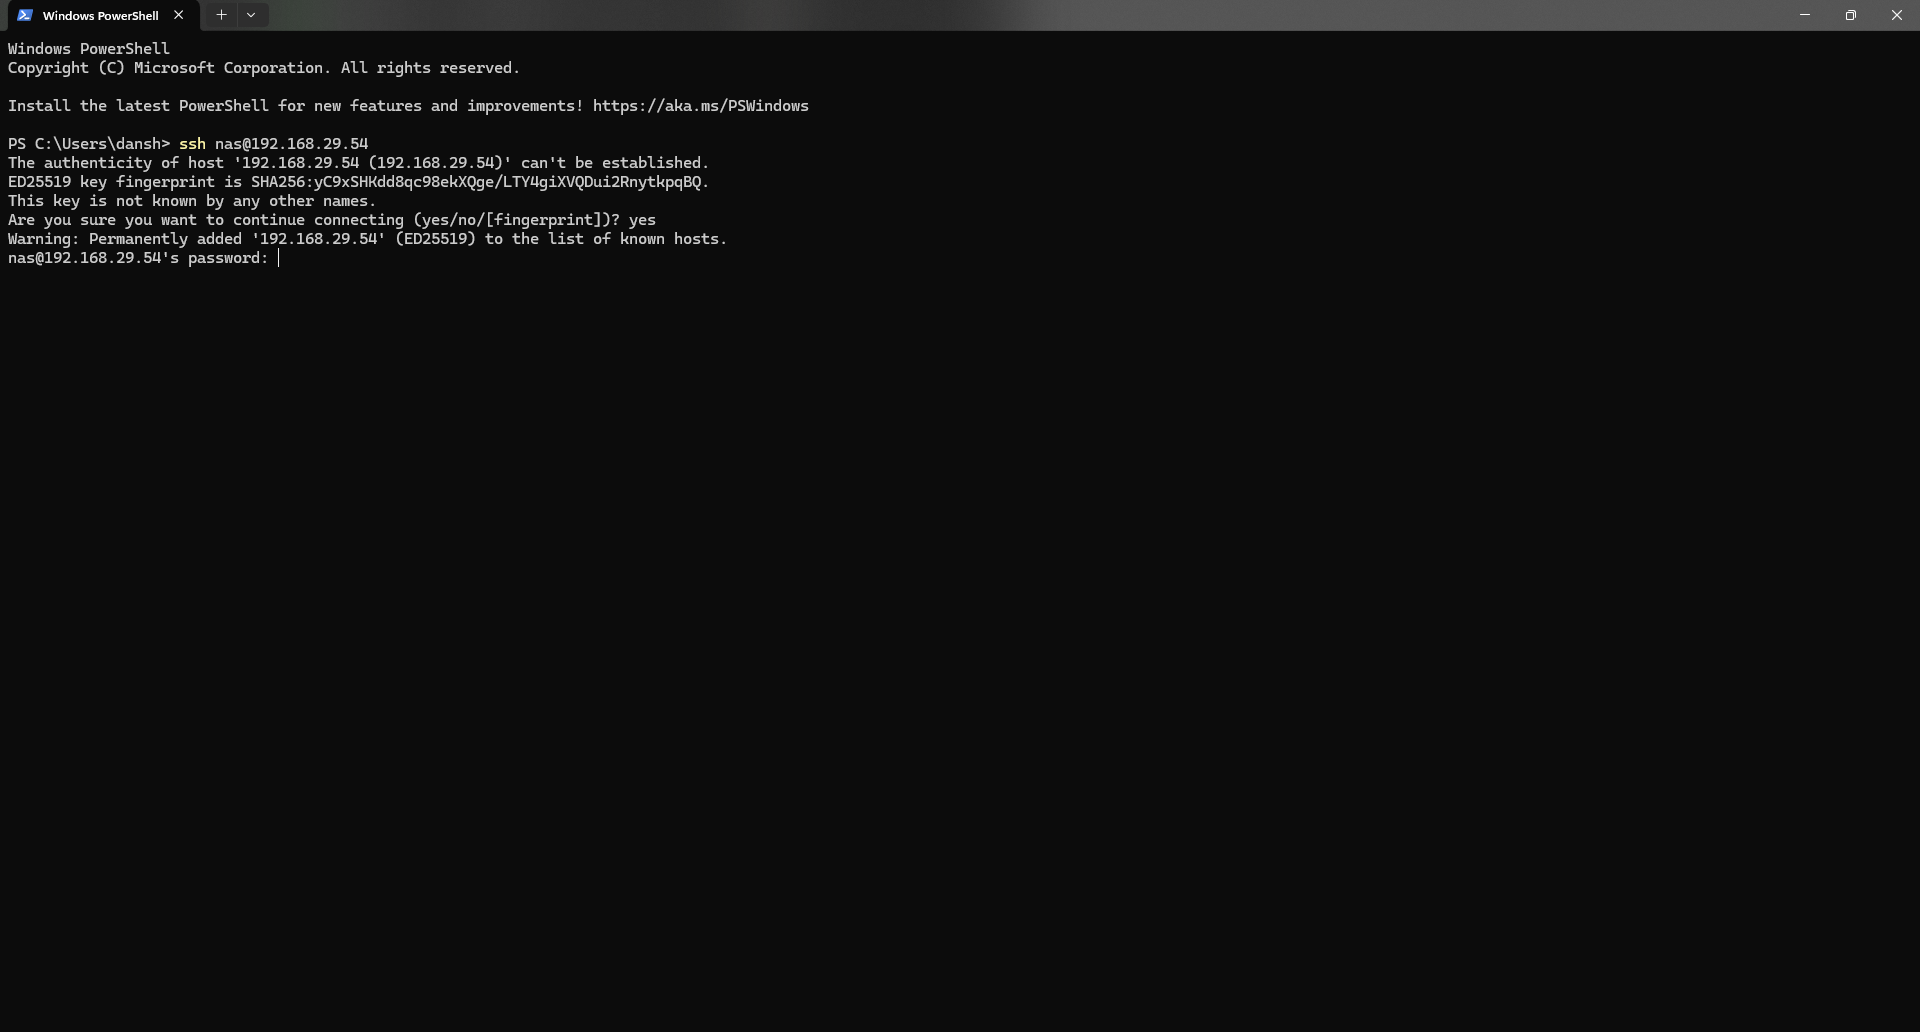
Enter the password

Now you can controll your pi without even touching it
\ Now enter the following code in the prompt to update and upgrade the system to the latest version.
sudo apt update && sudo apt upgrade:::tip This process will take time… so please be patient.t
:::
Now we will use wget to pull the GitHub repositories of Open Media Vault and run the repos using Bash.
sudo wget -O - https://raw.githubusercontent.com/OpenMediaVault-Plugin-Developers/installScript/master/install | sudo bash:::tip This might take even 30 minutes to complete
:::
The installation part is done
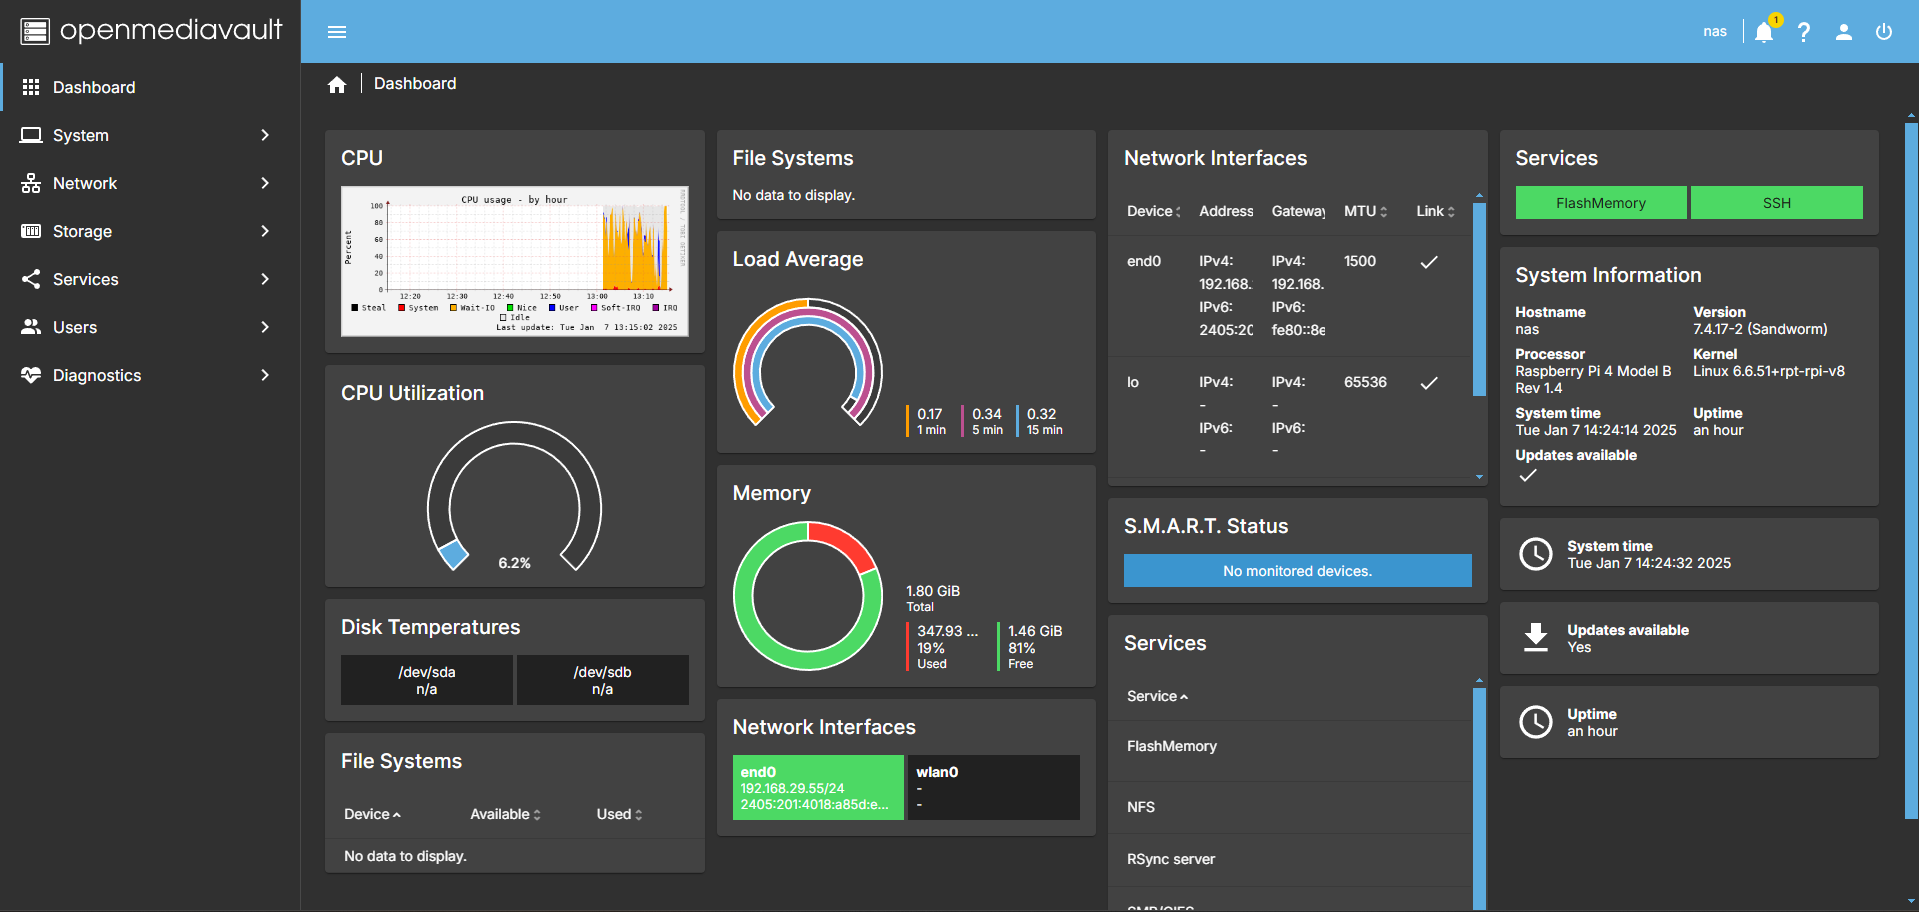
Setting up Open Media Vault(OMV):::info The IP of the Raspberry Pi may change
:::
:::tip It is recommended to reboot the Raspberry Pi
:::
:::info After reboot please note the IP of the Pi
:::
Type the IP of the Pi in the search bar of a web browser on the computer.
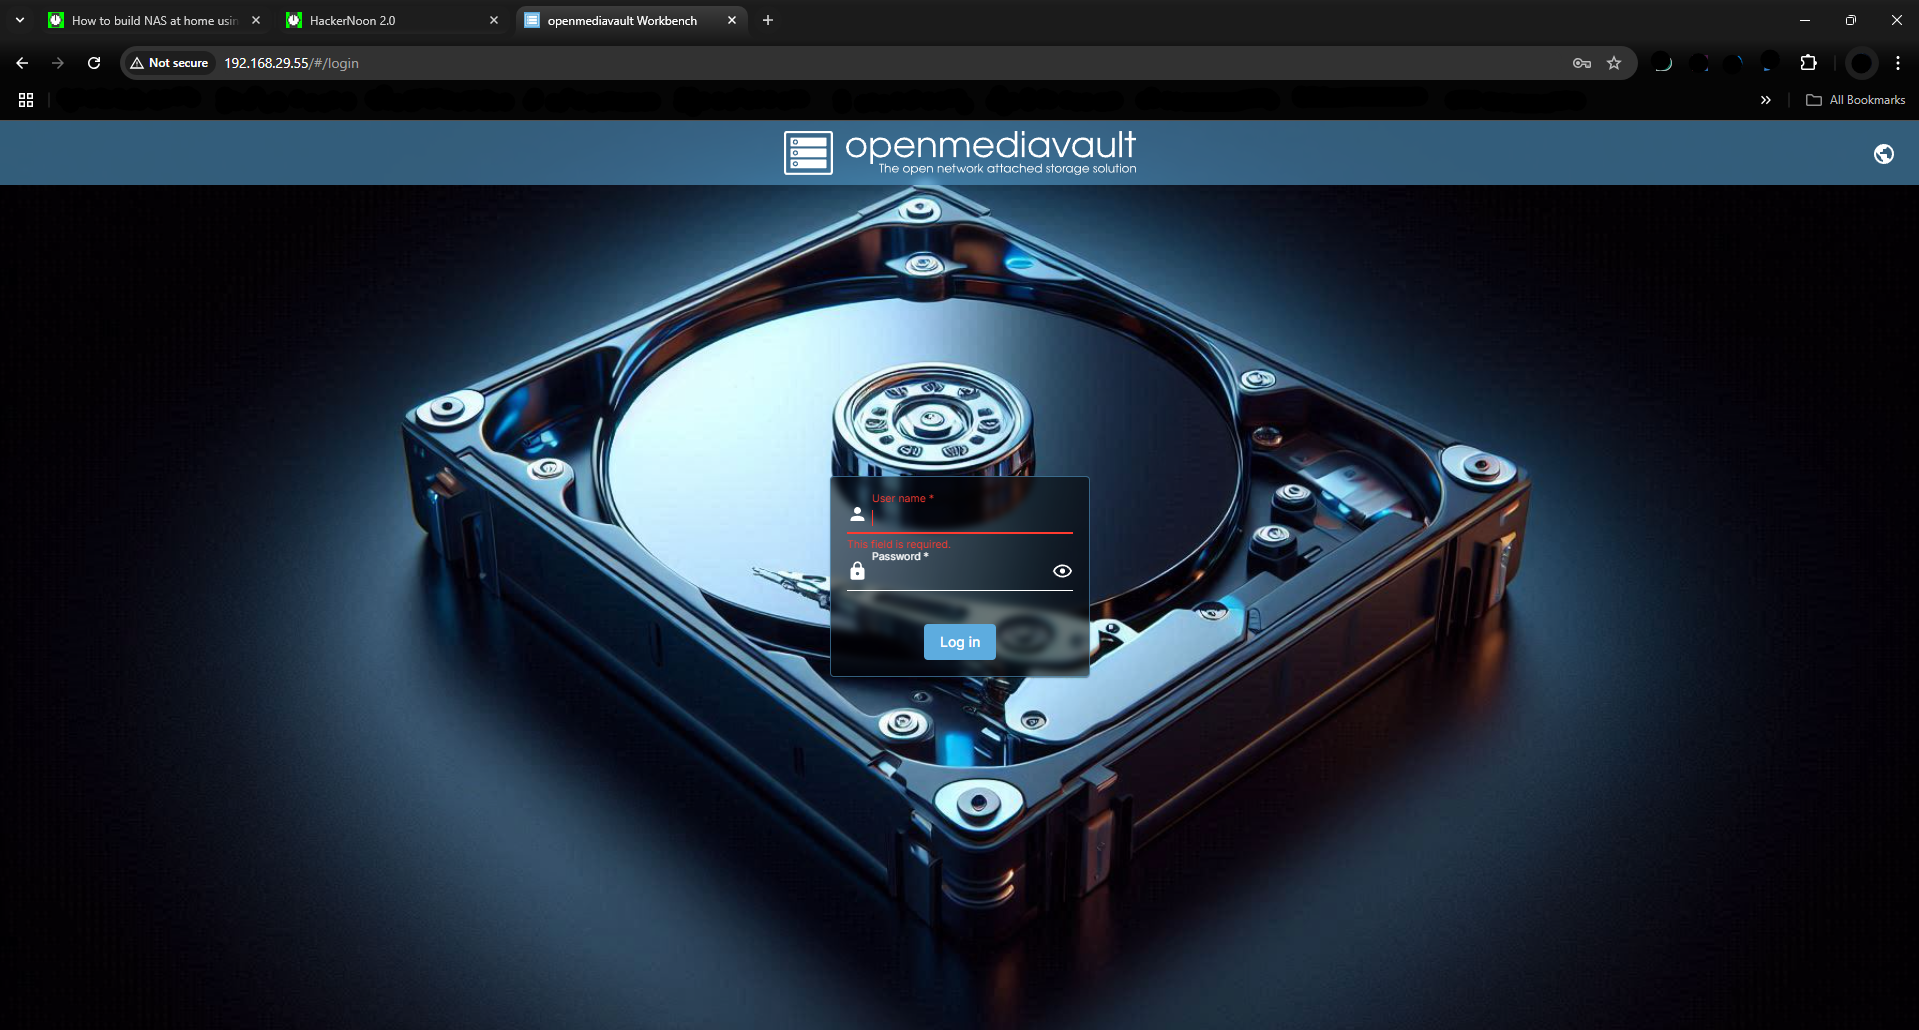
In username type “admin” and in password type”openmediavault”.
Now we need to insert the storage device(the device where all the files will be saved) on your computer
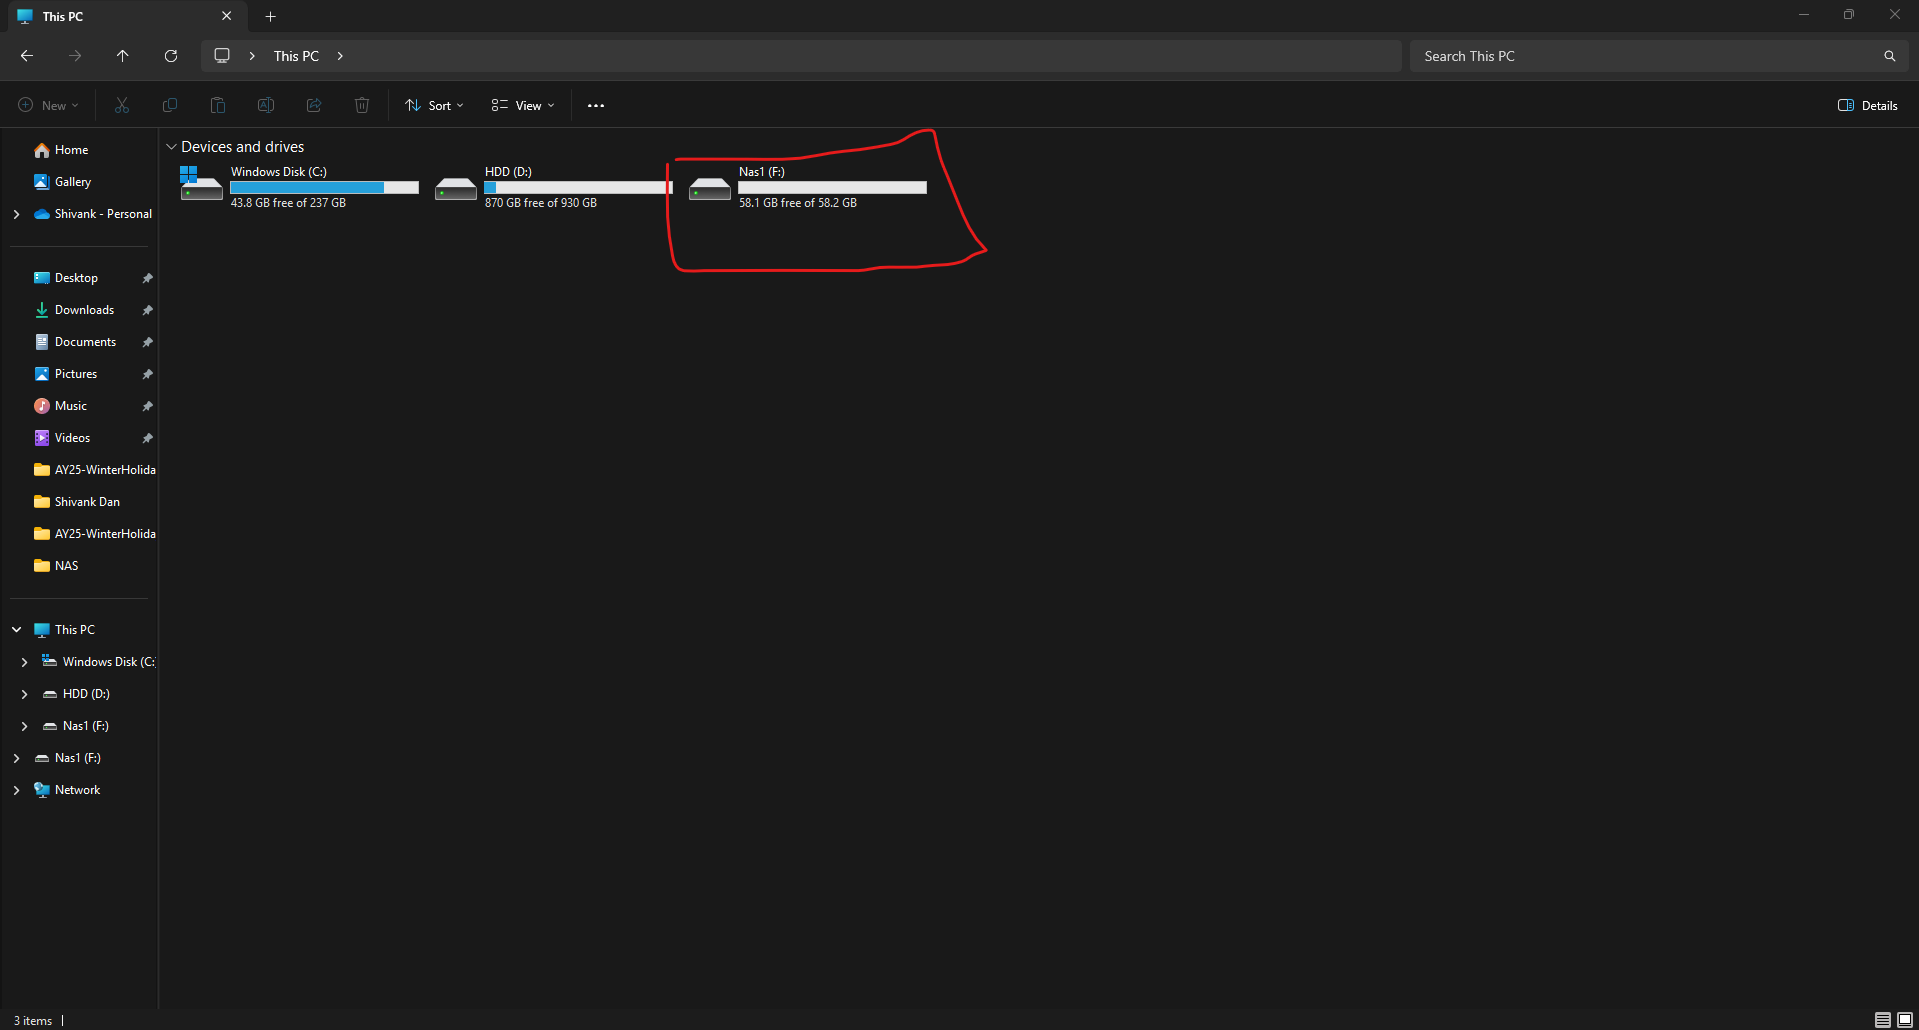
:::warning Be cautious not to select one of your SSDs or hard drives in your computer by mistake. Additionally, if the storage device you plan to use for the project contains important data, make sure to back it up beforehand, as all data on the device will be erased.
:::
Right-click on the drive and click on the format button
Write the name you want to give to the drive and change the file system to NTFS
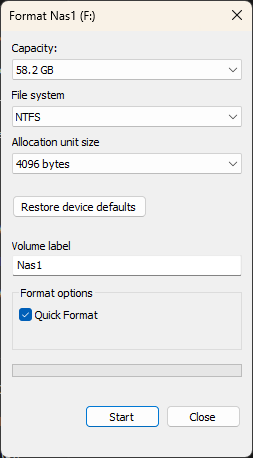
:::tip Please select the file system to NTFS
:::
and click on start
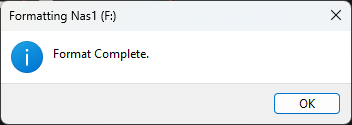
you will me notified with the following message when completed
now go back to the OMV workplace(that page you open in chrome) and insert the drive you just formatted to the pi
Now go to the user settings button and select Change password 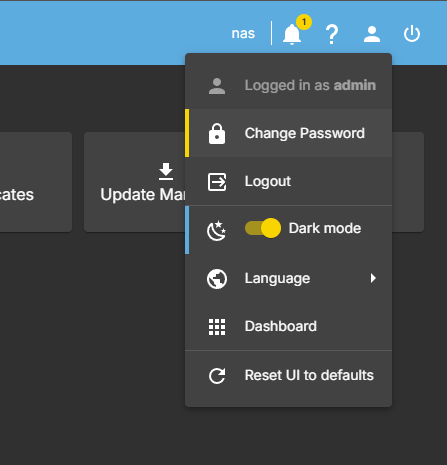
Write