and the distribution of digital products.
How to Create Your Own NPM Package - 2024 Cookbook
Recently, I needed to encapsulate some of my utility code into a standalone NPM package. It had been a couple of years since I last worked on something similar, and I quickly realized that some things had changed. I encountered a few pitfalls along the way, which inspired me to write this article as a reference and guide.
The Focus & RequirementsThis article focuses on optimizing the developer experience when using your library code as an NPM dependency. The implied tech stack includes:
- A host web app powered by React, bootstrapped using react-scripts
- A library that also utilizes React
- TypeScript for both the host app and the library
\ The key requirements for seamless library integration, ensuring the best developer experience, are:
- The library should be consumable by a TypeScript-based host app
- It should be possible to include the library locally via file:/path/to/the/library
- The library should also be installable via a GitHub link
- TypeScript compiler’s watch mode must function for the library
\ I won’t be diving deep into TypeScript setup in this article. If you need assistance with that, feel free to refer to the tsconfig.json configurations in my repositories for both the host app and the library.
\ Let’s get started!
TypeScript SetupLet’s assume we have "outDir": "./dist" in our tsconfig.json. In this case, we need to add the following lines to our package.json:
"main": "./dist/index.js", "types": "./dist/index.d.ts",Note that "types" refers to the bundled declaration file, which is generated by the TypeScript compiler (tsc) from the main declaration file, typically index.ts. This main declaration file should export not only the types defined in your library but also every public function or class that the library provides to the host app. Essentially, index.ts serves as the entry point of the library.
\ Next, ensure that you have build and prepare scripts in your package.json:
"scripts": { "build": "npx tsc", "prepare": "npm run build",The prepare script will run automatically after your library is installed by a host app.
Installing the Dependency Locally and the “peerDependencies” ProblemIn the host app’s package.json, you can install the library locally like this:
"dependencies": { "my-lib": "file:../my-lib",\ However, after running the host app with npm start, you might encounter the dreaded Invalid hook call error:
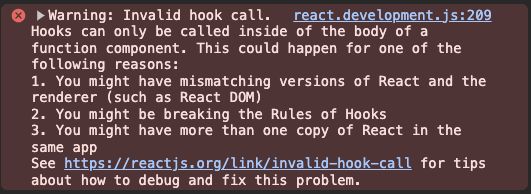
The 3rd point suggests that we might have more than one copy of React in the same app, which is exactly what's happening here — both the host app and the library have React installed. This can be easily resolved by moving React to the peerDependencies section of the library’s package.json:
"peerDependencies": { "react": "^18.3.1"This informs the package manager that the library depends on React, which could potentially conflict with the host app’s dependencies. As a result, only a single copy of React should be included in the final bundle. NPM handles this by deduplicating the dependencies.
\ Let’s verify whether the React package has been deduplicated using npm ls react:
[email protected] /Users/user/dev/my-app ├─┬ [email protected] │ └── [email protected] deduped ├─┬ [email protected] -> ./../my-lib │ └── [email protected]We can see that a copy of React in react-dom was deduplicated, whereas in my-lib, it wasn’t.
\ If we run the host app again we are still going to see the same Invalid hook call error.
\ The reason is that our library has been installed locally and the NPM handles local packages via symlinks, which are not deduped.
\ There are several ways to solve this problem, one of which is npm-dedupe utility. However, I prefer not to use this approach, as it traverses the entire dependency tree and modifies it in multiple steps. This process can be quite heavy and time-consuming.
\ Another, better way, is to tweak the webpack.config.js:
resolve: { alias: { react: path.resolve('./node_modules/react'),This way, we tell the web pack to always use the React package from the host app’s node_modules.
\ Since our host app is powered by react-scripts, we can’t access the webpack configuration without “ejecting” the app. To avoid this, we can use the react-app-rewired utility. This tool enables us to inject custom pieces of configuration into the existing webpack config.
\ Here’s how our config-overrides.js should look like:
const path = require('path'); module.exports = function override(config, env) { if (env !== 'development') return config; config.resolve.alias = { ...config.resolve.alias, react: path.resolve('./node_modules/react'), }; return config; };Please note the line with a condition that checks the environment env !== 'development', so we do not override the config in case of any non-dev environment.
\ Now, let’s run the host app another time, to check if the problem was solved. (Note: you may have to remove node_modules and run npm i again.) This time, we’ll get a different error:
ERROR in ./src/App.tsx 5:0-65 Module not found: Error: You attempted to import /Users/user/dev/my-app/node_modules/react which falls outside of the project src/ directory. Relative imports outside of src/ are not supported. You can either move it inside src/, or add a symlink to it from project's node_modules/.\ That’s because the react-scripts webpack configuration has a ModuleScopePlugin plugin, that runs this check, which we need to disable. Again, we can disable this plugin by simply overriding the webpack’s config. The resulting config-overrides.js will look like this:
const path = require('path'); const ModuleScopePlugin = require('react-dev-utils/ModuleScopePlugin'); module.exports = function override(config, env) { if (env !== 'development') return config; config.resolve.plugins = config.resolve.plugins.filter(plugin => !(plugin instanceof ModuleScopePlugin)); config.resolve.alias = { ...config.resolve.alias, react: path.resolve('./node_modules/react'), }; return config; }; “Watch” Mode SetupAnother thing that is nice to have while developing a library is “watch” mode. TypeScript compiler (tsc) provides this feature out of the box. To enable the “watch” mode, we simply need to add one more script to our package.json:
"scripts": { "build:watch": "npx tsc -w",The -w flag is a shorthand for --watch. Once this flag is set, the TypeScript compiler will monitor any changes in the rootDir and automatically update the compiled output in the outDir.
Turning a Dependency Into a Remote OneThe final step is to host our library remotely, for example, on GitHub. Once you’ve created a GitHub repository for your library, you can easily install the library via its URL in the host app's package.json:
"dependencies": { "my-lib": "git+https://github.com/username/my-lib.git#main"Note that #main specifies the branch name from which the library should be installed.
ConclusionIn conclusion, the most challenging problem we faced was the peerDependencies issue with locally installed packages. However, aside from that hurdle, the process of developing and integrating an NPM package is relatively straightforward. By following the outlined steps, you can efficiently encapsulate your utility code and enhance the developer experience in your projects.
\