and the distribution of digital products.
Complete Gemini CLI Setup Guide for Your Terminal
Have you ever wished for an AI assistant right inside your terminal window? Well, your dream may have just come true because Google just released Gemini CLI. In this tutorial, I’m going to show you everything you need to know about this new open-source AI agent. We’ll cover how to use it, the pricing, and some useful tips and tricks. So, if you’re ready, let’s get started! ;)
Gemini CLI is a free and open-source AI agent that works directly in your terminal. This powerful tool brings Google’s Gemini models to your command line, allowing for natural language interaction to get work done. You can ask it to:
- Write and explain code.
- Edit files.
- Explain errors.
- Run shell commands.
- and much more!
You don’t have to constantly switch between a web app and your terminal. And the best part? It’s free, with no complicated setup.
Getting Started with Gemini CLI Step 1: Install Gemini CLI on LinuxYou can install Gemini CLI on Linux, Mac, and Windows. All the setup we will do inside the terminal. I am using Linux, but for Mac and Windows, the commands are almost the same, so you can follow my steps.
To get started, make sure you have Node.js version 18 or higher. You can check this by running:
node -vIf you don’t have it, use the following command to install it:
sudo apt update && sudo apt install nodejs npmThen, I installed Gemini CLI globally with:
npm install -g @google/gemini-cliIf you don’t want to install it globally, you can also use:
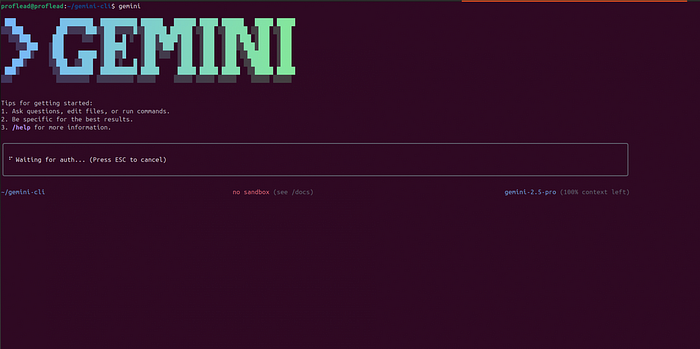
npx https://github.com/google-gemini/gemini-cli Step 2: Run and Log InAfter installing, just type:
geminiAfter that, you need to log in with your personal Google account.
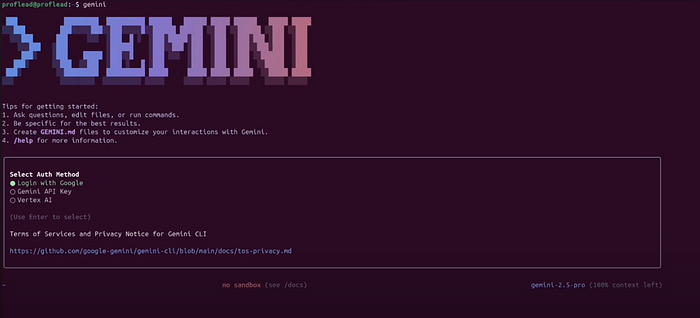
This gives you access to a free Gemini Code Assist license, which includes:
- Access to Gemini 2.5 Pro.
- A massive 1 million token context window.
- 60 model requests per minute.
- 1,000 model requests per day at no charge.
You can also use an API key from Google AI Studio if you prefer.
Step 3: Try It OutNow you are ready to start asking questions and running tasks. You can ask the Agent to create a project, fix the bugs, explain the code in specific files, etc. Ensure that you run the agent within your project folder.
> What does the file index.js do?It read the file, analyzed it, and gave a clear explanation.
> Add error handling to index.jsYou can also run shell commands directly by using !, like this:
!ls -al Creating a Simple To-Do App with Google CLINow that we’re all set up, let’s ask the AI to create a simple to-do application using HTML, CSS, and JavaScript. I will type “create a simple to-do app using simple js and html” into the Gemini CLI.” Watch the video to see the step-by-step process and the result.
Watch on YouTube: Gemini CLI: Complete Tutorial
Using Built-in ToolsGemini CLI has some handy built-in tools. You can use commands like:
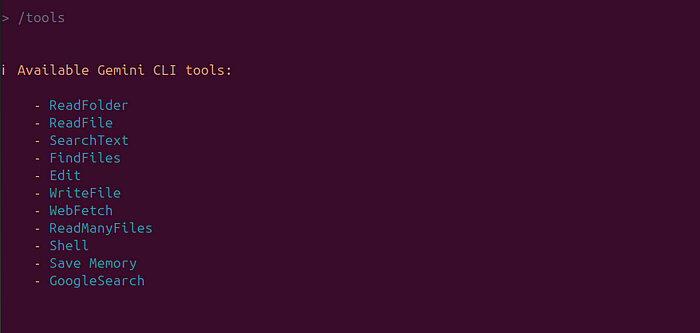
- ReadFolder (ls). Lists files and folders in a directory—just like the shell ls command.
- ReadFile (read-file). Reads the full content of a single file, useful for summaries or analysis.
- ReadManyFiles (read-many-files). Reads multiple files at once, typically matching a glob pattern (e.g., all .js files)
- FindFiles (glob). Searches for files by pattern (e.g., find all config.json across your project).
- SearchText (grep). Searches within files for text, like finding all TODO comments.
- Edit (edit). Applies code changes via diffs. Gemini previews edits and asks for approval before applying them.
- WriteFile (write-file). Creates new files (for example, README.md) with user-provided content.
- Shell (shell). Runs commands you prefix with ! (e.g., !npm test) directly in the terminal .
- WebFetch (web-fetch). Fetches content from the web (HTML or JSON), enabling Gemini to analyze external data.
- GoogleSearch (web-search). Performs a Google search to ground responses with real-world information (e.g., explanation for an error).
- Save Memory (memoryTool). Stores facts or preferences during a session (like “I prefer async/await”) to improve consistency
To see all available tools, you can use the /tools command.
Advanced FeaturesYou can add specific instructions for the AI for a particular project by creating a GEMINI.md file in your project’s root directory. Inside this file, you can define project rules, code styles, and the tools the agent should use. This ensures that the generated code is consistent with your project’s standards.

For most day-to-day uses, the built-in tools will suffice. But what if you want Gemini CLI to do something very domain-specific, like interact with specific APIs or use a specialized model (say an image generator or a security analysis tool)? This is where MCP (Model Context Protocol) comes in.
MCP is essentially an open standard that allows developers to add new tools/abilities to the AI by running a server that the CLI can communicate with. In Gemini CLI, you can configure “MCP servers” in a JSON settings file, and the CLI will treat those as additional tools it can use.
How to Set Up the MCP Server in Google CLIAs an example, I am going to show you how to set up the GitHub MCP server in Gemini CLI.
Inside your project folder, create a folder by using the command:
mkdir -p .gemini && touch .gemini/settings.jsonInside the file, add the following code:
{ "mcpServers": { "github": { "command": "npx", "args": ["-y", "@modelcontextprotocol/server-github"], "env": { "GITHUB_PERSONAL_ACCESS_TOKEN": "[YOUR-TOKEN]" } } } }After that /quit , from the Gemini CLI, and then reopen it.
Write /mcp command, and you will see a list of GitHub tools.
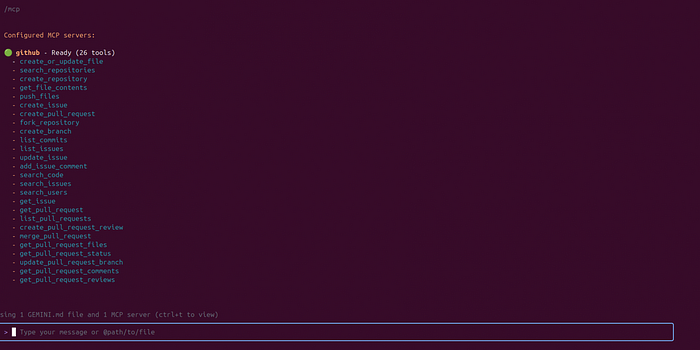
Now you, Agent, can interact with GitHub. That simple! :)
Gemini CLI PricingYou can try it free for personal usage, but there is also a paid version that is billed based on token usage.
Free Preview Tier
- Cost: Free with Google account
- Limits: Up to 60 requests/min and 1,000 requests/day
- Great for individual developers and small-scale use
Paid / API Key Usage
- Use your own Gemini API key for higher usage
- Billed based on tokens consumed (model and usage dependent)
Enterprise Options
- Available through Gemini Code Assist Standard or Enterprise plans
- Includes advanced features like governance, audit logs, and shared quotas
As you can see, Gemini CLI is a really powerful tool with a lot of potential. I’m excited to see how I’ll be using it in my daily workflow.
If you write code, debug things, or manage files often, this tool is worth checking out.
If you have any feedback, please share it in the comments below. ;)
Cheers!