and the distribution of digital products.
ARKit & LiDAR: Building Point Clouds in Swift (part 2)
In the second part of our exploration into creating a point cloud, we will build upon the foundation established in the first part.
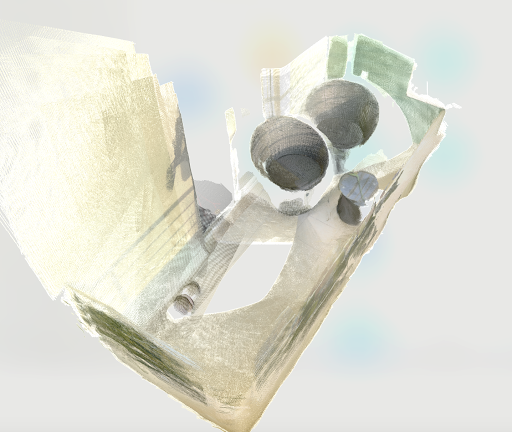
Having captured and processed individual colored points, our next objective is to merge these points into a unified point cloud. Afterward, we will visualize the point cloud in the AR view and finally export it to a .PLY file.
Storing verticesWe now have both the color and 3D position of each point from the depth map. The next step is to store these points in the point cloud, but simply appending every point we capture would be inefficient and could lead to an unnecessarily large dataset. To handle this effectively, we need to filter the points coming from different depth maps.
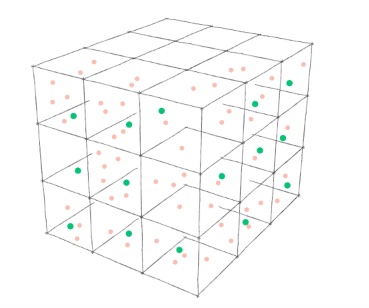
\ Instead of processing every single point, we’ll use a grid-based algorithm. This approach involves dividing the 3D space into uniform grid cells or "boxes" of a predefined size. For each grid cell, we store only a single representative point, effectively downsampling the data. By adjusting the size of these boxes, we can control the density of the point cloud.
\ This method not only reduces the amount of data stored but also gives us flexibility in fine-tuning the point cloud density depending on the requirements of the application—whether we need higher precision for detailed captures or a lighter dataset for faster processing.
\

\ \ Let’s define a Vertex, GridKey and a corresponding dictionary as part of our PointCloud actor.
actor PointCloud { //-- struct GridKey: Hashable { static let density: Float = 100 private let id: Int init(_ position: SCNVector3) { var hasher = Hasher() for component in [position.x, position.y, position.z] { hasher.combine(Int(round(component * Self.density))) } id = hasher.finalize() } } struct Vertex { let position: SCNVector3 let color: simd_float4 } private(set) var vertices: [GridKey: Vertex] = [:] //-- }\ GridKey is designed to round point coordinates based on a specified density, allowing us to assign to the same key the points that are positioned near each other.
\ We can complete the process function now.
func process(frame: ARFrame) async { guard let depth = (frame.smoothedSceneDepth ?? frame.sceneDepth), let depthBuffer = PixelBuffer\
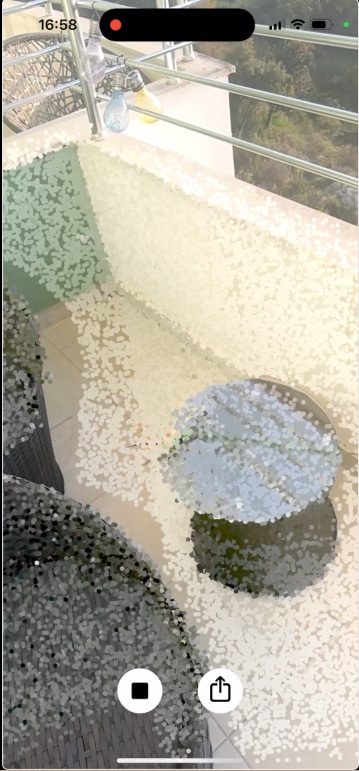
Visualization of the point cloudTo visualize the point cloud in the AR view, we will create an SCNGeometry each time a frame is processed, which will be displayed using an SCNNode. This approach allows us to dynamically render the point cloud in real-time.
\ However, rendering a high-density point cloud can significantly strain the device's resources, potentially leading to performance issues. To address this and maintain smooth rendering, we will implement a tiny optimization which is drawing only every 10th point from the cloud. This selective rendering will help balance visual fidelity and performance, ensuring that the app remains responsive while the point cloud still conveys essential details of the scanned environment.
\ Let’s create a geometryNode in our ARManager and attach it to the rootNode in the initializer.
Next, we will add an async updateGeometry function that will convert vertices from point cloud to a SCNGeometry and replace the geometry in geometryNode.
\ Finally, we will integrate this updateGeometry function into our processing pipeline.
actor ARManager: NSObject, ARSessionDelegate, ObservableObject { //-- @MainActor let geometryNode = SCNNode() //-- @MainActor override init() { //-- sceneView.scene.rootNode.addChildNode(geometryNode) } @MainActor private func process(frame: ARFrame) async { guard !isProcessing && isCapturing else { return } isProcessing = true await pointCloud.process(frame: frame) await updateGeometry() // <- add here the geometry update isProcessing = false } func updateGeometry() async { // make an array of every 10th point let vertices = await pointCloud.vertices.values.enumerated().filter { index, _ in index % 10 == 9 }.map { $0.element } // create a vertex source for geometry let vertexSource = SCNGeometrySource(vertices: vertices.map { $0.position } ) // create a color source let colorData = Data(bytes: vertices.map { $0.color }, count: MemoryLayoutFinally, we’ll export the captured point cloud to a .PLY file, utilizing the Transferable protocol for seamless data handling in SwiftUI ShareLink.
\ The .PLY file format is relatively straightforward, consisting of a text file that includes a header specifying the content and structure of the data, followed by a list of vertices along with their corresponding color components.
struct PLYFile: Transferable { let pointCloud: PointCloud enum Error: LocalizedError { case cannotExport } func export() async throws -> Data { let vertices = await pointCloud.vertices var plyContent = """ ply format ascii 1.0 element vertex \(vertices.count) property float x property float y property float z property uchar red property uchar green property uchar blue property uchar alpha end_header """ for vertex in vertices.values { // Convert position and color let x = vertex.position.x let y = vertex.position.y let z = vertex.position.z let r = UInt8(vertex.color.x * 255) let g = UInt8(vertex.color.y * 255) let b = UInt8(vertex.color.z * 255) let a = UInt8(vertex.color.w * 255) // Append the vertex data plyContent += "\n\(x) \(y) \(z) \(r) \(g) \(b) \(a)" } guard let data = plyContent.data(using: .ascii) else { throw Error.cannotExport } return data } static var transferRepresentation: some TransferRepresentation { DataRepresentation(exportedContentType: .data) { try await $0.export() }.suggestedFileName("exported.ply") } }\
Completing the UINow that we’ve built the core functionality of our app, we can complete our UI.
The UI will include a button to start and stop the capture of the point cloud, as well as an option to export and share the generated point cloud file.
\ In our main view, we’ll create a ZStack that overlays the AR view with buttons for controlling the capture process and sharing the result.
@main struct PointCloudExampleApp: App { @StateObject var arManager = ARManager() var body: some Scene { WindowGroup { ZStack(alignment: .bottom) { UIViewWrapper(view: arManager.sceneView).ignoresSafeArea() HStack(spacing: 30) { Button { arManager.isCapturing.toggle() } label: { Image(systemName: arManager.isCapturing ? "stop.circle.fill" : "play.circle.fill") } ShareLink(item: PLYFile(pointCloud: arManager.pointCloud), preview: SharePreview("exported.ply")) { Image(systemName: "square.and.arrow.up.circle.fill") } }.foregroundStyle(.black, .white) .font(.system(size: 50)) .padding(25) } } } }\
\

\

\
Final ThoughtsIn this two-part article, we’ve built a basic AR application capable of generating and presenting 3D point clouds using ARKit and LiDAR in Swift. We discovered how to extract LiDAR data, convert it to points in 3D space, and unite it into a single point cloud, along with the ability to export and share it as a .PLY file.
\ This app is just the beginning. You could enhance it further by adding features like more advanced filtering, allowing the user to adjust point cloud density, or improving the cloud quality by replacing the points in the grid dictionary depending on distance or other factors.
\ The compact and cost-effective nature of the iPhone's LiDAR makes advanced depth sensing accessible to developers and opens up a world of possibilities for innovative applications.
\ Happy coding!
- Home
- About Us
- Write For Us / Submit Content
- Advertising And Affiliates
- Feeds And Syndication
- Contact Us
- Login
- Privacy
All Rights Reserved. Copyright , Central Coast Communications, Inc.