EVM Token Faucet
Claim Testnet tokens every 24 hours for your development and testing needs.
Please note: These are testnet-only tokens with no real economic value.
Whether you are a new developer or a seasoned developer, you have definitely wagged your fingers at how hard it is to get testnet tokens. From the lack of faucet solutions to strigent requirements for existing solutions. In this tutorial, I will teach you how to build your own faucet be it for your team or personal use.
Okay, but I have no idea what a faucet is in cryptoThats totally okay too. Think of the traditional faucet that discharges water whenever you need it so also does crypto faucets discharge testnet tokens when you need it.
\ A textbook definition would be
\
A crypto faucet is a platform that provides users with small quantities of cryptocurrency for completing simple tasks. These tasks could range from viewing an ad, participating in a survey, or even just proving you're a human by completing a captcha. The quantities provided by these faucets are often small, akin to the drops from a leaky faucet, hence the name.
\ Testnet tokens are essentially test(or fake money) we use to transact or pay for transactions on the test environments of blockchain solutions. it provides a risk free environment for developers to deploy, test and explore smart contracts on the blockchain.
\
Sounds good, but if its a crypto faucet, why do we need Typescript, Nextjs and RedisThere are different approaches to building faucets for testnet tokens. Some solutions utilize a smart contract for disbursement of tokens but his approach while good, has some limitations. The most glaring disadvantage of using a smart contract for your faucet lies in the immutable nature of smart contracts themselves. Once deployed, the contract cannot be modified and this presents a roadblock for you if you need to upgrade, change configuration or even correct errors in implementation.
\ The best approach to building faucet, is to implement as a webApp and use web3 frameworks like EtherJs to interact with the blockchain. This gives us the necessary flexibility needed to be able to upgrade and modify our faucet in the future including setting up anti-sybil protection.
\ In this tutorial, we will be building a nextjs application with typescript and using redis to rate-limit users and also protect our faucet from sybil attacks. Our faucet will be able to disburse testnet ETH and also, ERC20 tokens.
\
Tech stack\
ArchitectureTo give a brief overview of how our faucet is built:
\
Setting up your environmentphew! finally, lets start hacking. The first thing we need to do is to create our working directory. So on the terminal, we run
\
mkdir faucet cd faucet\ Then initialize a nextjs project
\
npx create-next-app@latest:::tip you can just hit enter to select all default options
:::
\ Next, we install shadcn and install all the components we will be using. you can check out the documentation to learn more about shadcn.
\
npx shadcn@latest init -d\
npx shadcn@latest add button form input label select toast use-toast\ Now, we add other dependencies we will be needing.
\
npm i [email protected] ioredis rate-limiter-flexible\ Your project should look exactly like mine if you’ve followed the above steps.
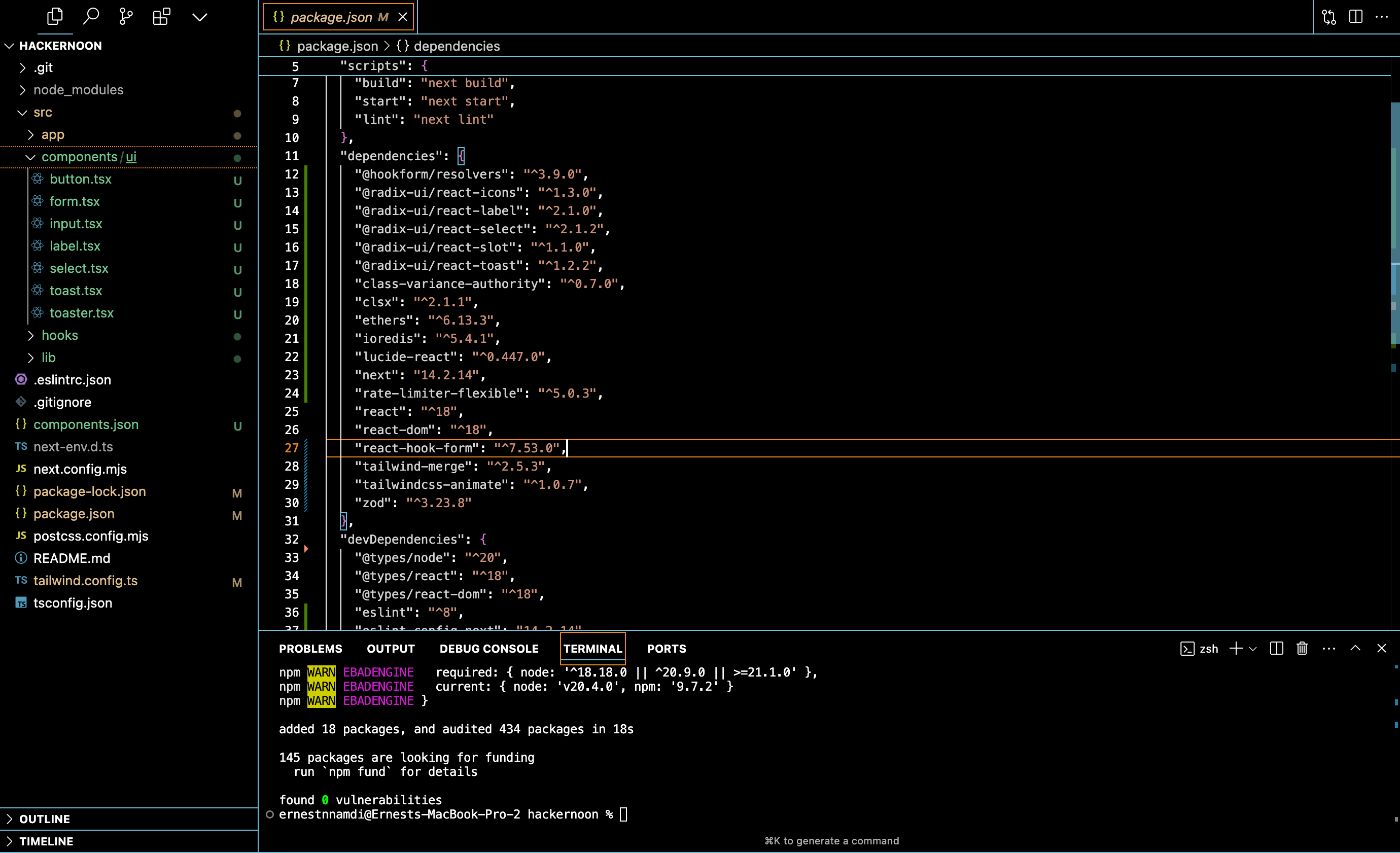
\
Building the HomepageGo to the page.tsx file in the app folder, delete the existing boilerplate code and replace it with the code below. we are keeping our homepage cutesy(depending on the year you read this, forgive the cringeness) but simple.
\
import FaucetForm from "@/components/FaucetForm"; import { InfoIcon } from "lucide-react"; export default function Home() { return (Claim Testnet tokens every 24 hours for your development and testing needs.
Please note: These are testnet-only tokens with no real economic value.
\ As you could already predict, the next component we have to build is the FaucetForm component.
\
FaucetForm.tsxIn the components folder, create a new file called FaucetForm.tsx and paste in the code below.
\
"use client"; import { useState } from "react"; import { zodResolver } from "@hookform/resolvers/zod"; import { useForm } from "react-hook-form"; import { z } from "zod"; import { Form, FormControl, FormField, FormItem, FormMessage, } from "@/components/ui/form"; import { Input } from "@/components/ui/input"; import { Button } from "./ui/button"; import { Select, SelectContent, SelectItem, SelectTrigger, SelectValue, } from "./ui/select"; export default function FaucetForm() { const [isLoading, setIsLoading] = useState(false); const formSchema = z.object({ address: z .string() .regex(/^0x[a-fA-F0-9]{40}$/, "Invalid Ethereum address"), token: z.enum(["ETH", "PIRONTOKEN"]), }); const form = useForm\ This basic form utilizes the react-hook-form and zod which is provisioned for us from shadcn. The form allows users to choose between claiming ETH or our ERC20 token. On your browser, the faucet should look like below.
\
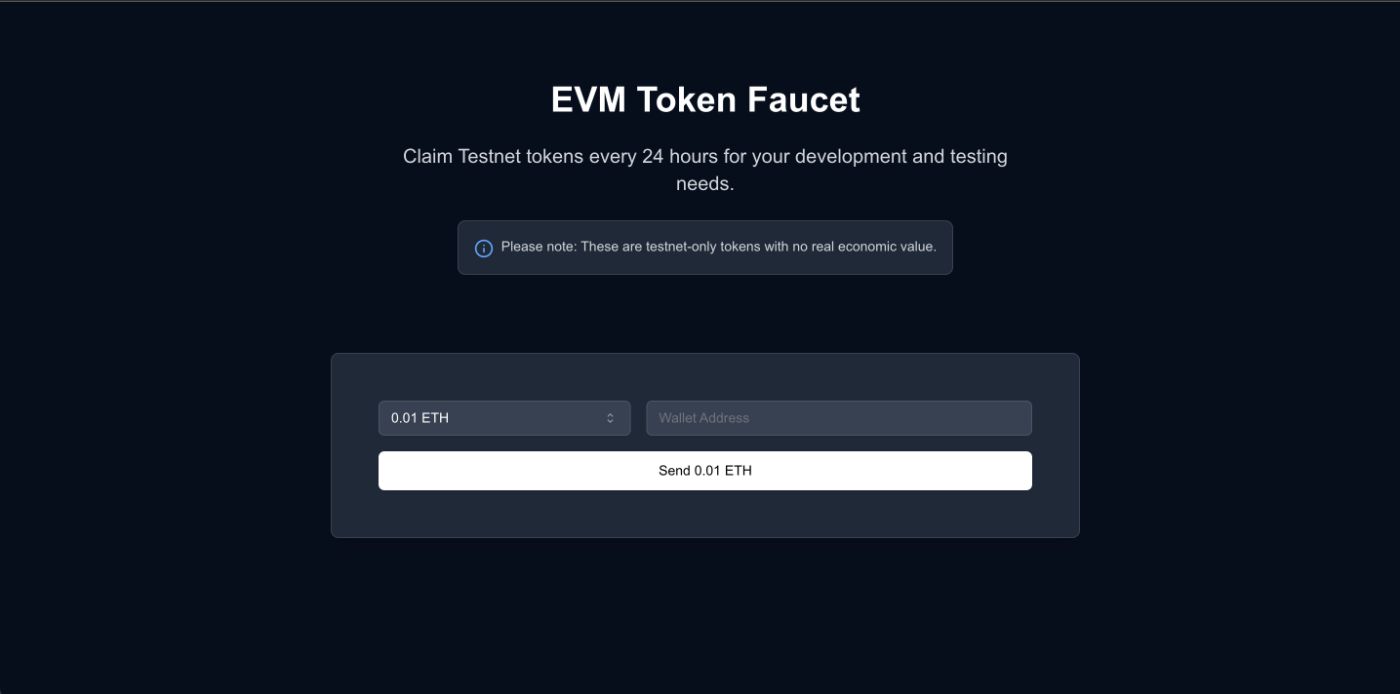
\ Now, at the moment, our faucet doesnt do anything because no logic has been implemented. Lets start off by adding our environment variables.
env.localIn the root of the project, we create a file called env.local and we add the following environment variables. I will be using Morph’s rpc url(you can use that of any chain of your choice). Piron token is the name of the ERC20 token we are using for the sake of this tutorial.
\ For the REDIS_URL, you can get it by creating an account on redis cloud and replacing the boiler text with your password and public endpoint.
\ Finally for the captcha keys, visit hcaptcha and create a site, set type to bot management, captcha behaviour to always challenge and treshold to auto.
\
MORPH_RPC_URL=https://rpc-quicknode-holesky.morphl2.io PRIVATE_KEY=your-private-key PIRON_TOKEN_ADDRESS=bleh REDIS_URL=redis://default:your-password@your-public-endpoint NEXT_PUBLIC_HCAPTCHA_SITE_KEY=site-public-key HCAPTCHA_SECRET_KEY=your-secret-key\
redis.tsNext, lets create a Redis client. In the lib folder, create a new file called redis.ts. The ioredis library helps us connect and interact with the redis server. The code below initializes the redis client and limits the amount of retries (in connecting to the server) to three while increasing the time between each retry from 50ms to 2 seconds.
\
import Redis from "ioredis"; if (!process.env.REDIS_URL) { throw new Error("REDIS_URL is not defined in the environment variables"); } const redis = new Redis(process.env.REDIS_URL, { maxRetriesPerRequest: 3, retryStrategy(times) { const delay = Math.min(times * 50, 2000); return delay; }, reconnectOnError(err) { const targetError = "READONLY"; if (err.message.includes(targetError)) { // Only reconnect when the error contains "READONLY" return true; } return false; }, }); redis.on("error", (error) => { console.error("Redis Client Error:", error); }); redis.on("connect", () => { console.log("Connected to Redis"); }); export default redis;\
rate-limiter.tsThe next logic we need to work on, is the rate limiter. Still in the lib folder, create another file called rate-limiter.ts and paste in the code below. The rate-limiter-flexible library uses redis as the backend to limit the amount of request (8) a specific ip address can make within a specified time window (per hour). this is done to prevent abuse and also bots from draining our faucet.
\
import { Redis } from "ioredis"; import { RateLimiterRedis } from "rate-limiter-flexible"; const redisClient = new Redis(process.env.REDIS_URL as string); export const rateLimiter = new RateLimiterRedis({ storeClient: redisClient, keyPrefix: "ratelimit", points: 8, // Number of requests duration: 60 * 60, // Per hour }); export async function limitRate(ip: string): Promise\
route.tsAfter setting up our redis client and rate limiter, we can finally start building the backend for our faucet. In the app folder, create a folder named api and append a file called route.ts. This is where we will be building the api routes for handling claims. In the route.ts file, paste the code below.
\
import { NextRequest } from "next/server"; import { ethers } from "ethers"; import redis from "../../lib/redis"; import { limitRate } from "../../lib/rate-limiter"; const ETH_FAUCET_AMOUNT = ethers.utils.parseEther("0.03"); const PIRON_FAUCET_AMOUNT = ethers.utils.parseUnits("10", 18); const COOLDOWN_PERIOD = 12 * 60 * 60; // 12 hours in seconds const provider = new ethers.providers.JsonRpcProvider({ url: process.env.MORPH_RPC_URL as string, skipFetchSetup: true, }); const wallet = new ethers.Wallet(process.env.PRIVATE_KEY as string, provider); const PIRON_TOKEN_ADDRESS = process.env.PIRON_TOKEN_ADDRESS as string; const pironTokenABI = [ "function transfer(address to, uint256 amount) returns (bool)", ]; const pironTokenContract = new ethers.Contract( PIRON_TOKEN_ADDRESS, pironTokenABI, wallet ); let lastNonce = -1; async function getNextNonce() { const currentNonce = await wallet.getTransactionCount("pending"); lastNonce = Math.max(lastNonce, currentNonce - 1); return lastNonce + 1; } async function verifyCaptcha(captchaResponse: string): Promise\ The code above allows a user to claim once every 12 hours. it creates an instance of a wallet by using our rpc_url(we are using morph in this example) and private key. Next, we create an instance of the piron token contract(our ERC20 token) by using ethers and passing in the contract address, abi and the wallet we just created as arguments.
\ for the getNextNonce function, Ethereum transactions require a nonce to prevent replay attacks. This function ensures that the correct nonce is used for transactions by tracking the last nonce and incrementing it. It is also useful in situations where there is network congestion.
\ The verifyCaptcha function sends a post request to hCaptcha to verify the user’s captcha response. The function returns a boolean value.
\ The main function which handles the claim, performs a number of checks before allowing the user to claim any token. First, it takes the ip address of the user to check if the user's IP has exceeded the rate limit. If they have, the request is rejected with a 429 Too Many Requests status.
\ next, it takes the data sent over from the frontend and ensures they’re valid before calling the verifyCaptcha function which we talked about earlier. If the captcha is verified, it checks for the lastClaimTime of the user by calling our redis database to ensure that the user is not abusing the faucet. If the time has exceeded the cooldown period , it proceeds to send the testnet tokens.
\
:::tip Sending native ETH and ERC20 tokens require different methods as demonstrated in the code above.
:::
finally, we set the last claim time for the user to the current time and add some error handling.
\ After this is done, your file structure should look like this.
\
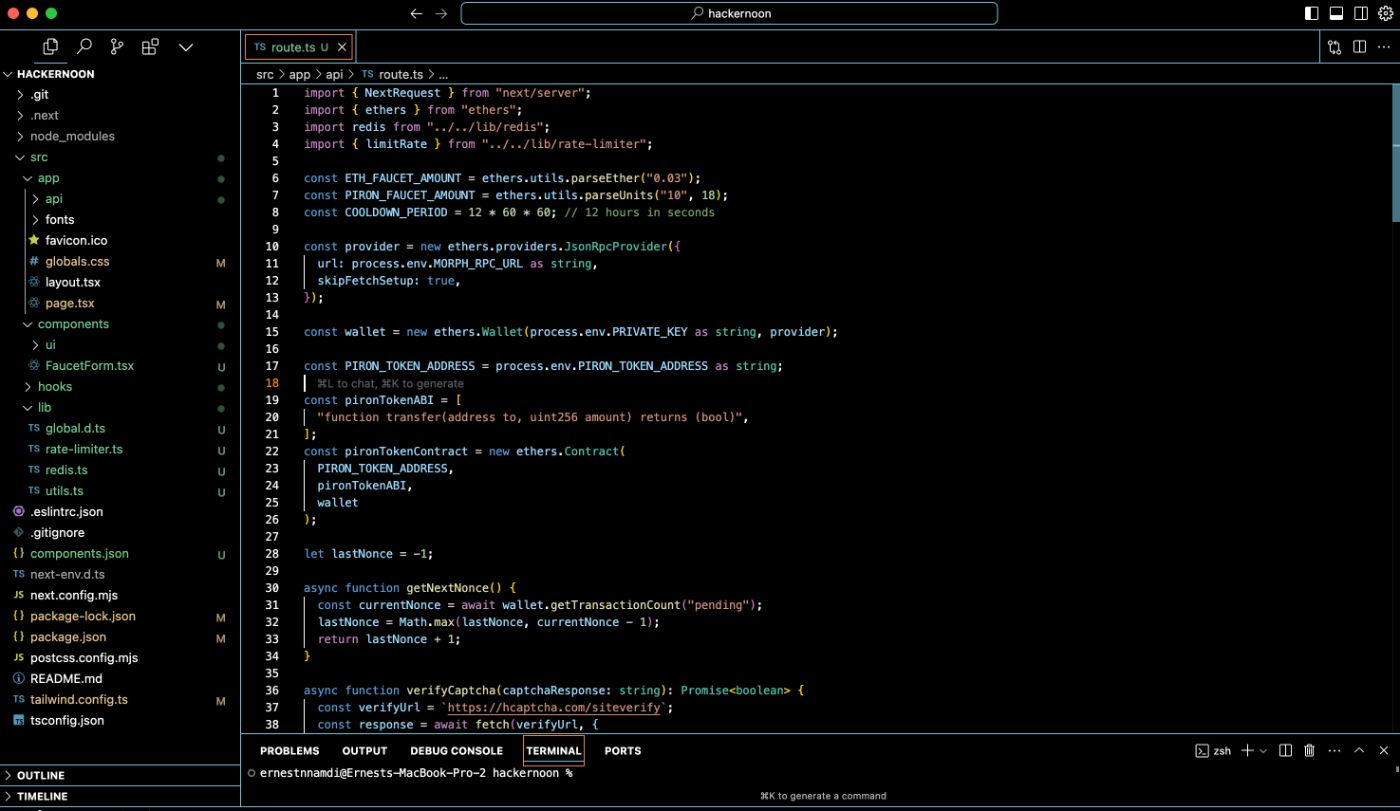
\
FaucetForm.tsxBack in our faucet form component, its time to connect the UI to the api. we start by installing one more dependency
\
npm i @hcaptcha/react-hcaptcha\ Next we create a captcha ref and destructure toast from the use-toast hook.
\
import { useToast } from "@/hooks/use-toast"; import { useForm } from "react-hook-form"; import { z } from "zod"; import { Form, FormControl, FormField, FormItem, FormMessage, } from "@/components/ui/form"; import { Input } from "@/components/ui/input"; import { ToastAction } from "./ui/toast"; import HCaptcha from "@hcaptcha/react-hcaptcha"; import { Button } from "./ui/button"; import { Select, SelectContent, SelectItem, SelectTrigger, SelectValue, } from "./ui/select"; export default function FaucetForm() { const [isLoading, setIsLoading] = useState(false); const { toast } = useToast(); const captchaRef = useRef\ \
const executeCaptcha = () => { if (captchaRef.current) { captchaRef.current.execute(); } }; const onCaptchaVerify = async (token: string) => { if (!token) { toast({ variant: "destructive", title: "Captcha verification failed", description: "Please try again.", }); return; } const formData = form.getValues(); await handleSubmit({ ...formData, captcha: token }); };\ The executeCaptcha function triggers the captcha to execute and the onCaptchaVerify function checks if a token was returned(ifnot its displays an error) and passes it to the handleSubmit function.
\
const handleSubmit = async ( data: z.infer\ The handleSubmit function takes in an argument called data which contains both the form data and also the token from captcha. Next, it sends a POST request to the api route, passing in the data as the request body. if the request is successful, it displays a success modal.
\ The toast component was modified to include a success variant so in your components/ui/toast replace the existing code with this
\
"use client"; import * as React from "react"; import * as ToastPrimitives from "@radix-ui/react-toast"; import { cva, type VariantProps } from "class-variance-authority"; import { X } from "lucide-react"; import { cn } from "@/lib/utils"; const ToastProvider = ToastPrimitives.Provider; const ToastViewport = React.forwardRef< React.ElementRef\ Finally, your updated FaucetForm should look like this
\
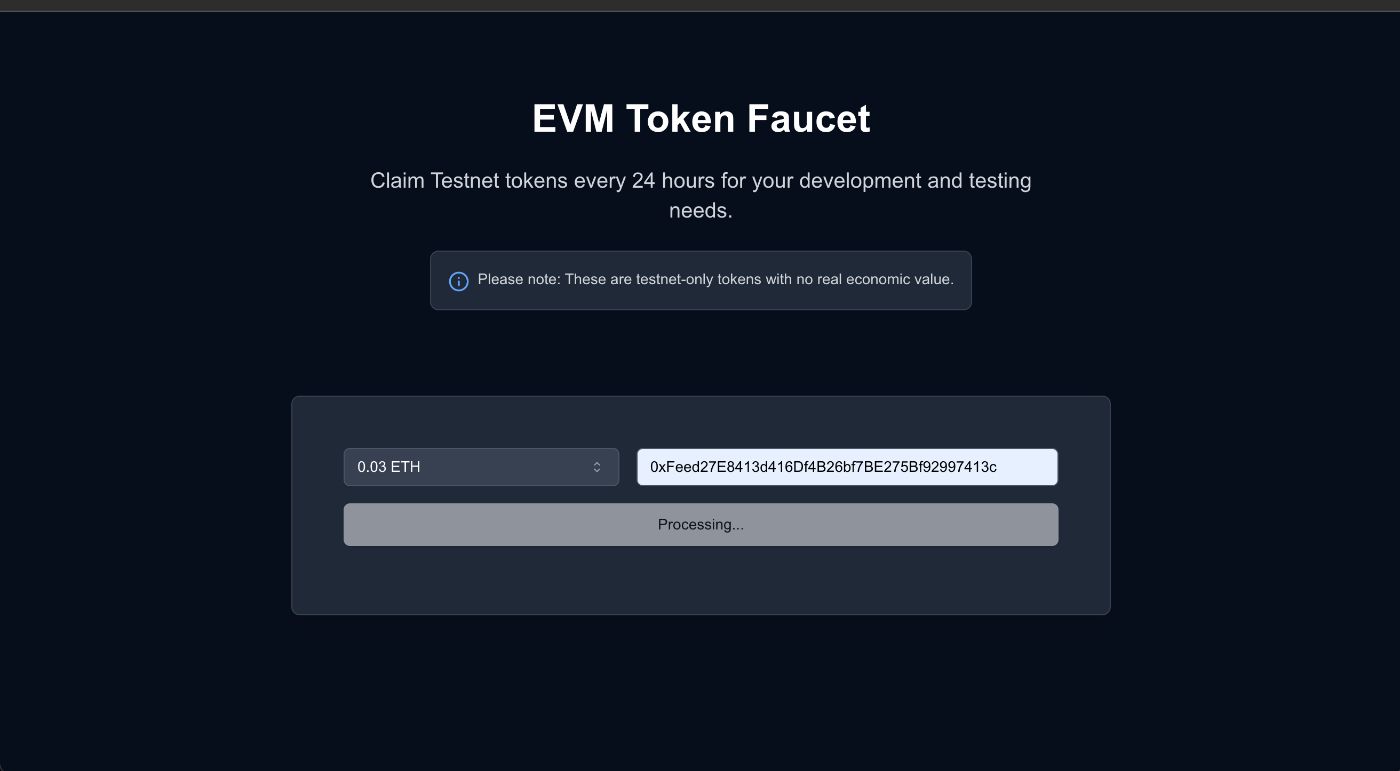
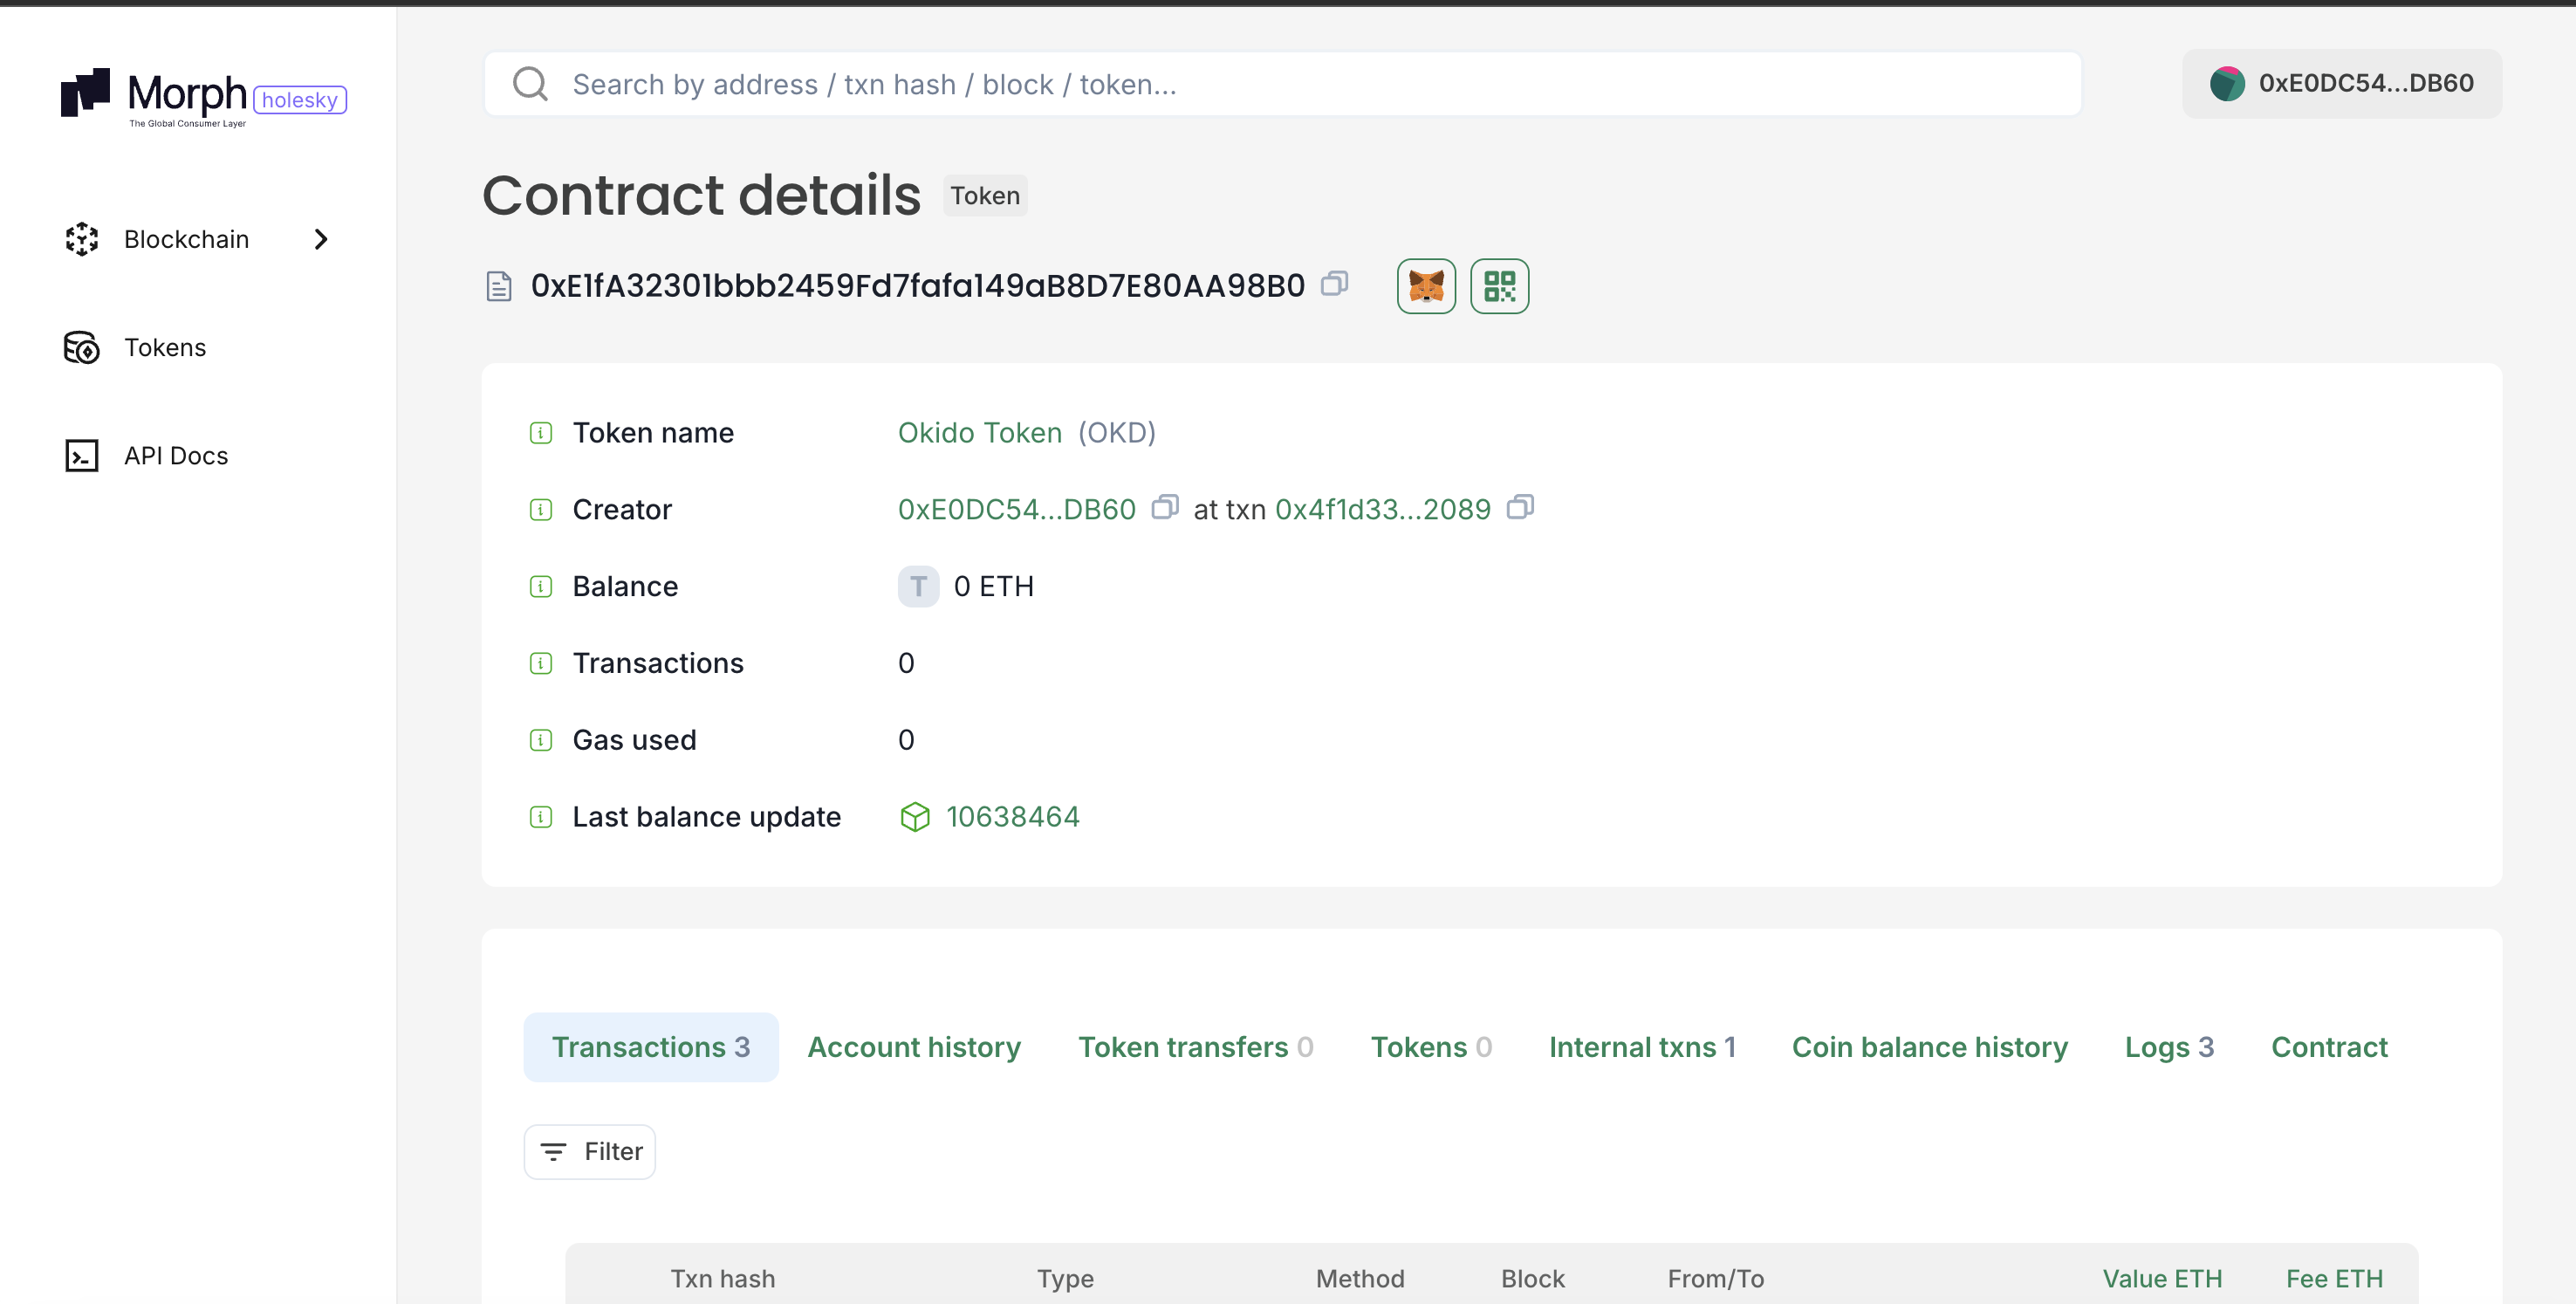
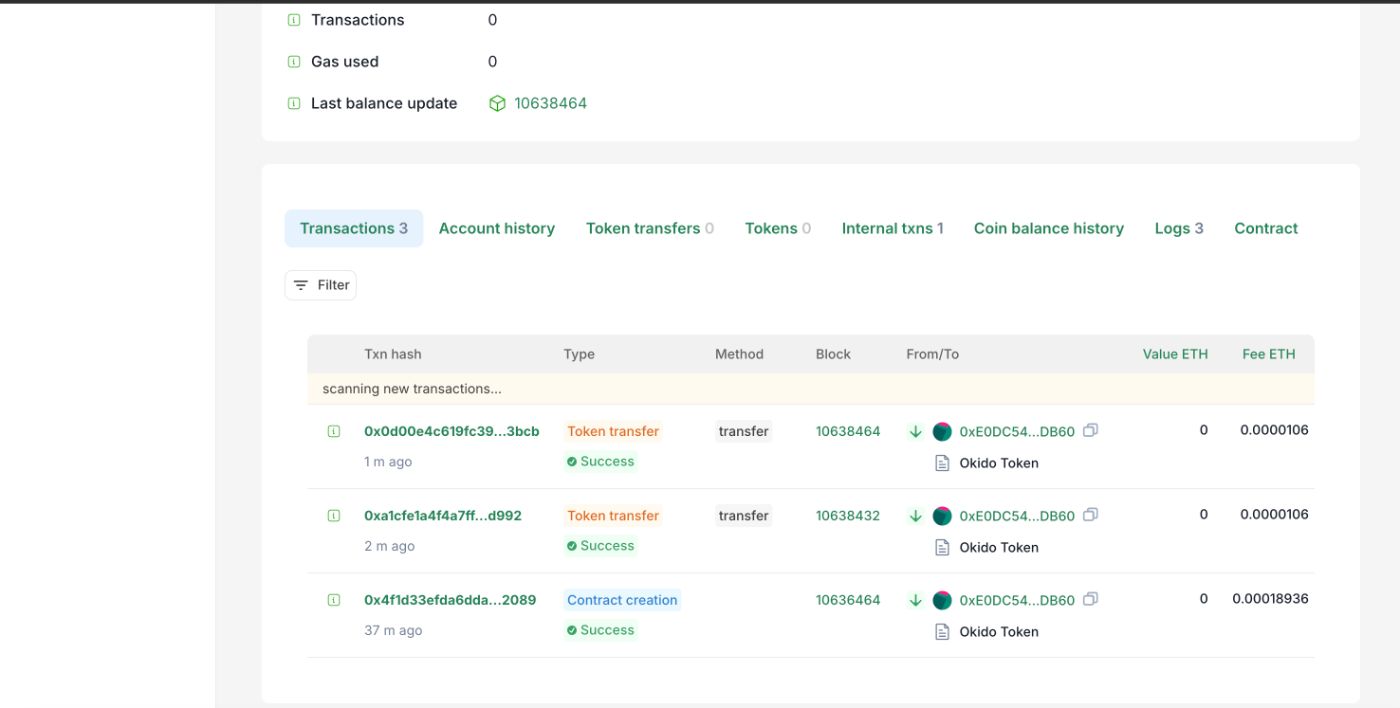
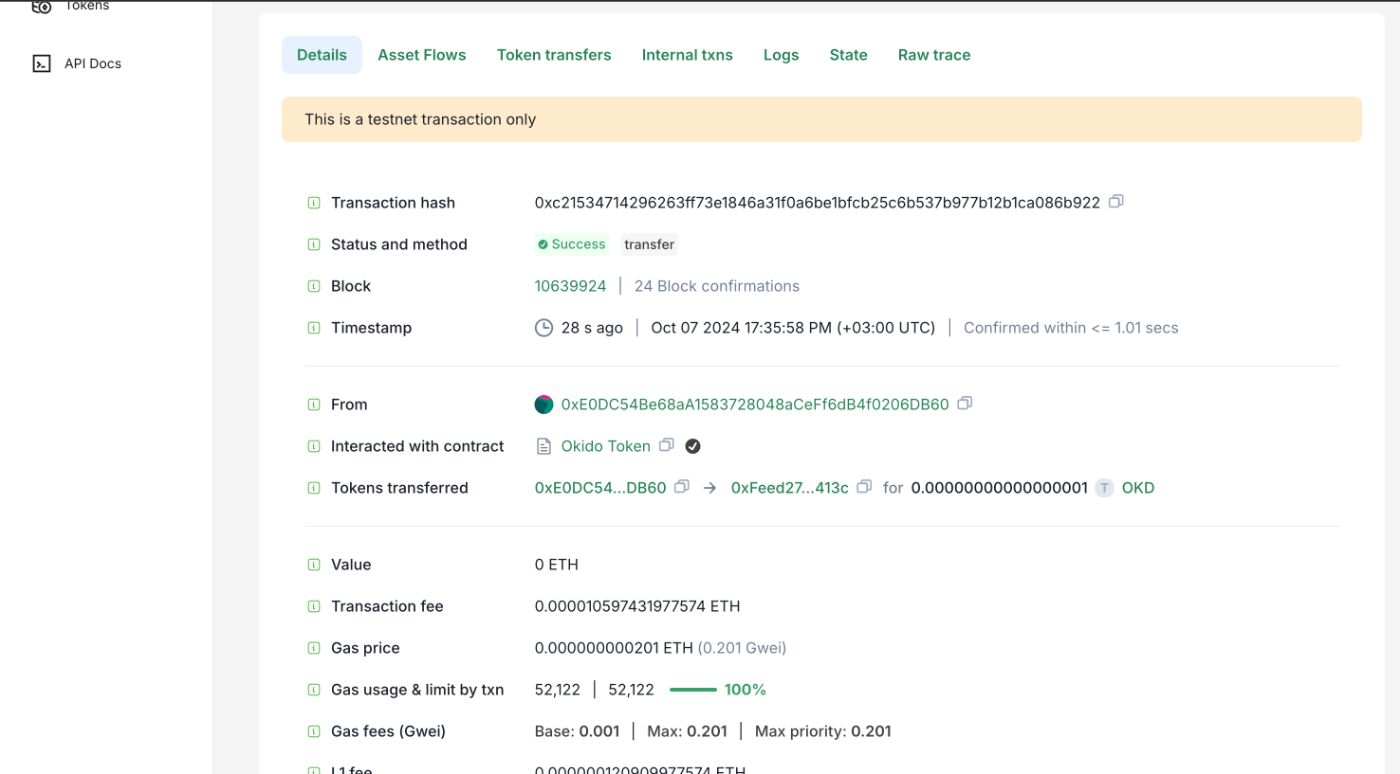
"use client"; import { useRef, useState } from "react"; import { zodResolver } from "@hookform/resolvers/zod"; import { useForm } from "react-hook-form"; import { useToast } from "@/hooks/use-toast"; import { z } from "zod"; import { Form, FormControl, FormField, FormItem, FormMessage, } from "@/components/ui/form"; import { Input } from "@/components/ui/input"; import { Button } from "./ui/button"; import { ToastAction } from "./ui/toast"; import HCaptcha from "@hcaptcha/react-hcaptcha"; import { Select, SelectContent, SelectItem, SelectTrigger, SelectValue, } from "./ui/select"; export default function FaucetForm() { const [isLoading, setIsLoading] = useState(false); const { toast } = useToast(); const captchaRef = useRef\ whew! now lets test our faucet to ensure all is working well.
\
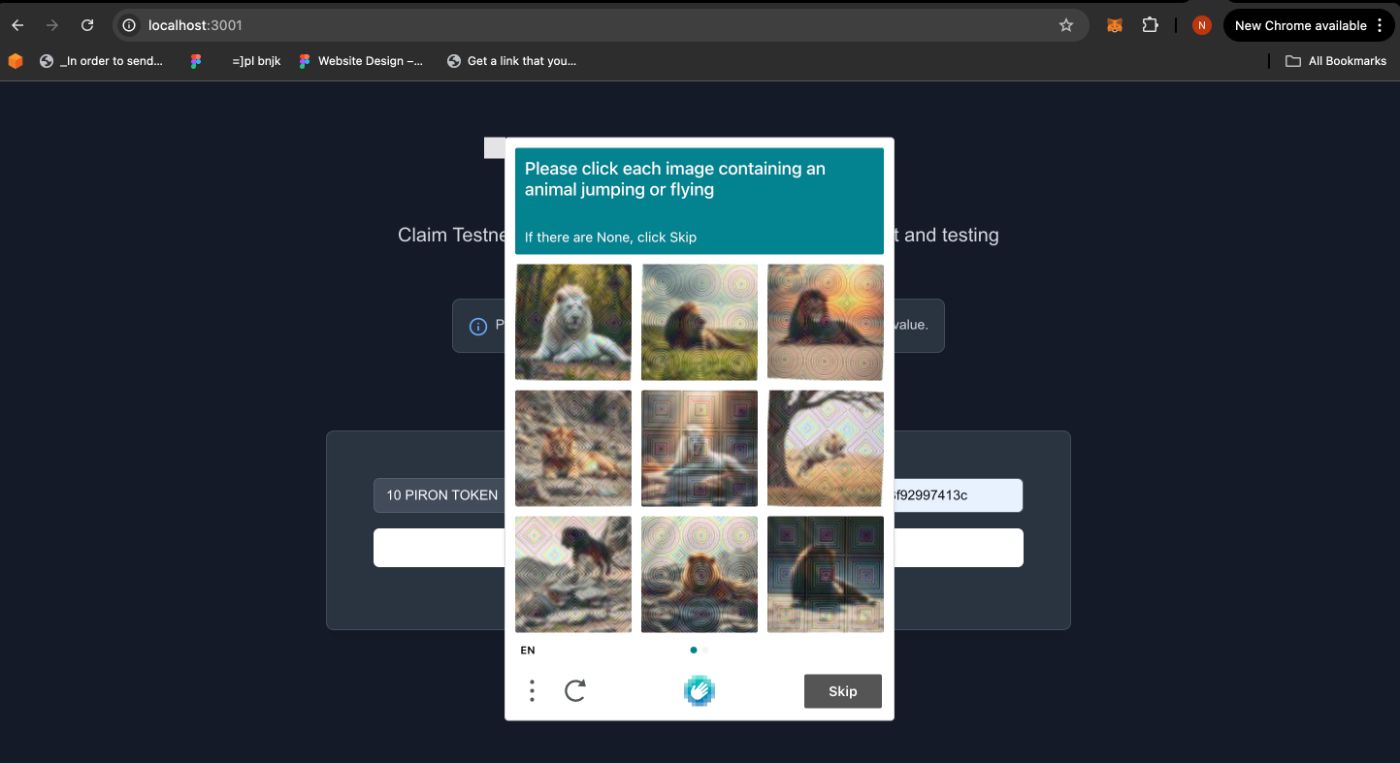
\
\
\
\
\
\
\
\
\
ConclusionBuilding a production grade faucet takes a lot of work and considerations(eg security) and in this tutorial, we have covered basically all aspects of building one. You could modify this faucet to serve whatever need you have whether as a chain, project or for personal use. If you have any issues while replicating this project, reach out to me (or drop a comment) on telegram @ernestelijah.
All Rights Reserved. Copyright , Central Coast Communications, Inc.